Agent Setup – Connecting to Server
What is OpenBots Agent?
OpenBots Agent acts as a connection between the user and an OpenBots Server instance. The Agent connects the user to OpenBots Server and allows for interactions between OpenBots Server and OpenBots Studio to take place. With the connection between the two established, the user is able to run processes developed in OpenBots Studio on any machine containing a connected agent. Processes can run in attended mode or they can be scheduled to run unattended. Additionally, it allows OpenBots Studio access to Asset, Credential, Server Email, and QueueItem commands.
*In order to connect OpenBots Agent, Agent must be installed in the targeted machine and the user must have access to OpenBots Server.
Setup OpenBots Agent
Extract current machine’s information
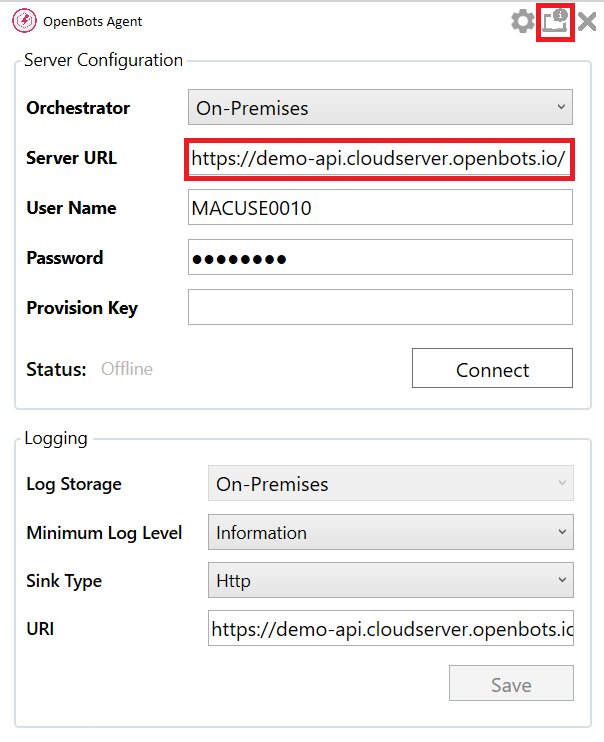
- Open OpenBots Agent. Indicate the server URL which the Agent will be connected to (this will aid in generating the correct server IP address). Select ‘Machine Info’ from the top menu.
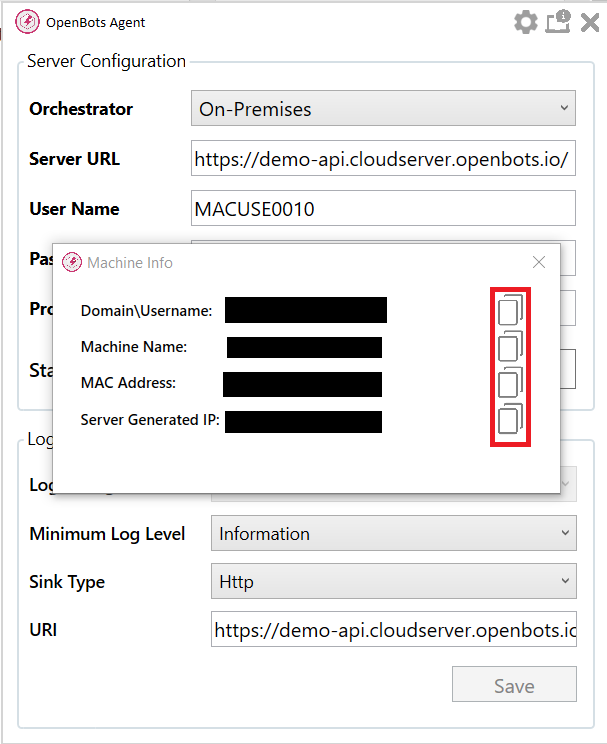
- The Machine Info window appears containing information that will be used throughout the setup. Use the icons on the far right to copy the generated values when needed.
Create Agent on OpenBots Server
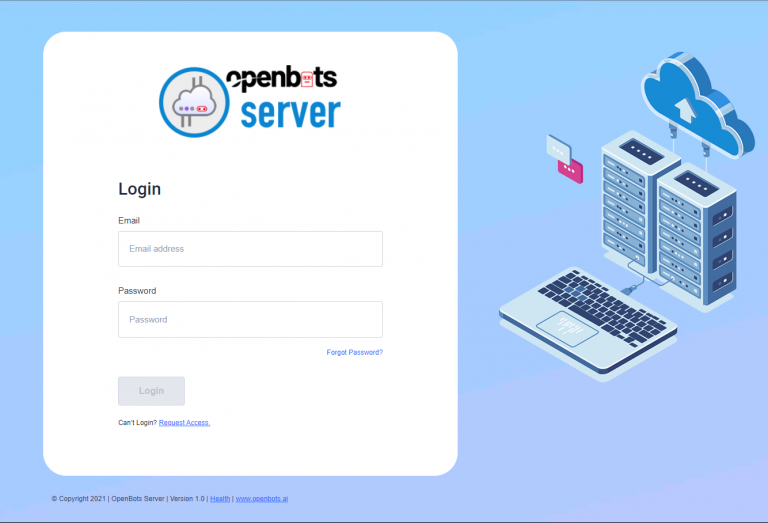
- Login to OpenBots Server using your email and password. (If you have not requested access to OpenBots Server, please do so using the ‘Request Access’ link below the Login button. Team members with admin privileges can approve access to Server by using the ‘Team’ tab in Server and accepting the request via the ‘Pending Approvals’ option).
- Navigate to the ‘Add Credential’ tab under ‘Credentials’.
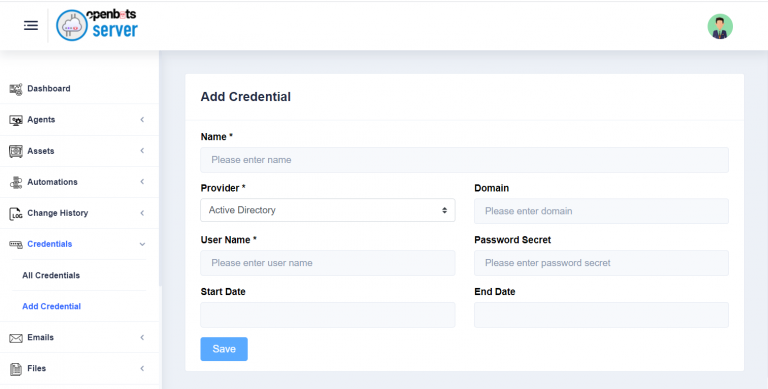
Indicate the following fields:
-
- Name: Indicate the name that will be associated with the credentials. Make sure to use a unique and easily identifiable name.
- Provider: Select ‘Active Directory’. This option indicates that the credentials will be used across OpenBots Server.
- Domain and Username: Domain and username associated with the machine that will contain Agent. Found on the Machine Info window as ‘Domain\Username’.
- Password Secret: Password associated with the previously indicated credentials. Note that the Password Secret field requires the actual password associated with the account on the computer. The field will not accept a PIN or any other kind of security log in feature/code.
- Start and End Date: Optional field. Date range that determines how long the credentials will be valid for.
- Navigate to the ‘Add Agent’ tab under ‘Agents’.
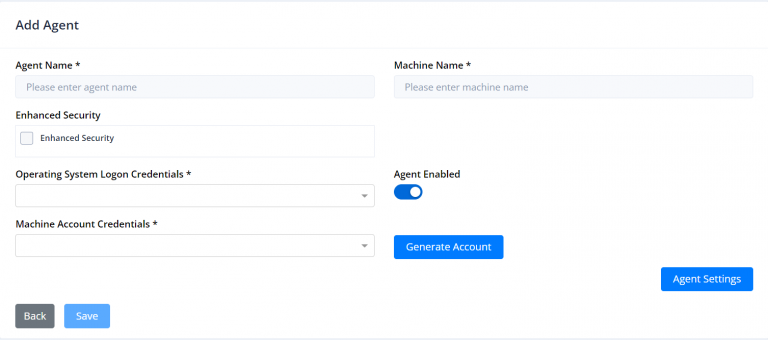
Indicate the following fields:
-
- Agent Name: Indicate the name that will be associated with the Agent. Make sure to use a unique and easily identifiable name.
- Machine Name: Name of the machine that will contain Agent. Found on the Machine Info window as ‘Machine Name’.
- Operating System Logon Credentials: Select the Active Directory credentials that were created in the previous step.
- User Name and Password: The user name and password that will be used to log into OpenBots Agent. This information can be set to any value. These are not the same user name and password that were used for the credentials. These will be entirely unique to OpenBots Agent.
- Enhanced security: Optional field. If checked, additional information will be needed to make a successful connection.
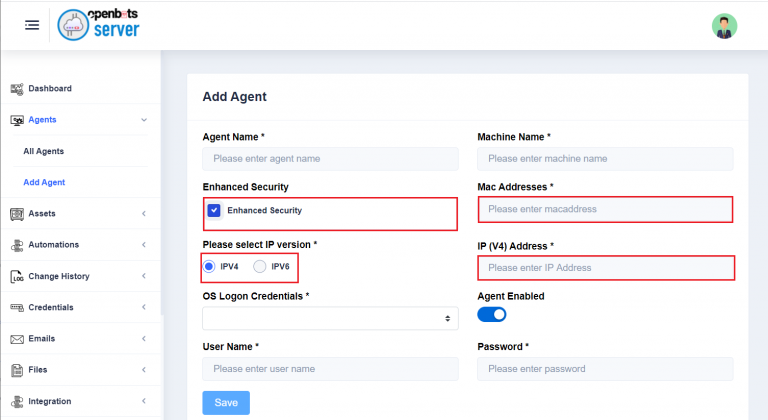
-
- Mac Address: MAC address of the machine that will contain Agent. Found on the Machine Info window as ‘MAC Address’.
- Select IP version: Choose the IP version that matches the ‘Server Generated IP’ value.
- IP (V4) Address/IP (V6) Address: IP Address associated with indicated server. Found on the Machine Info window as ‘Server Generated IP’.
Click the ‘Save’ button to create the Agent
Connect OpenBots Agent
- Click on ‘Generate Account’ and copy generated Username and Password.
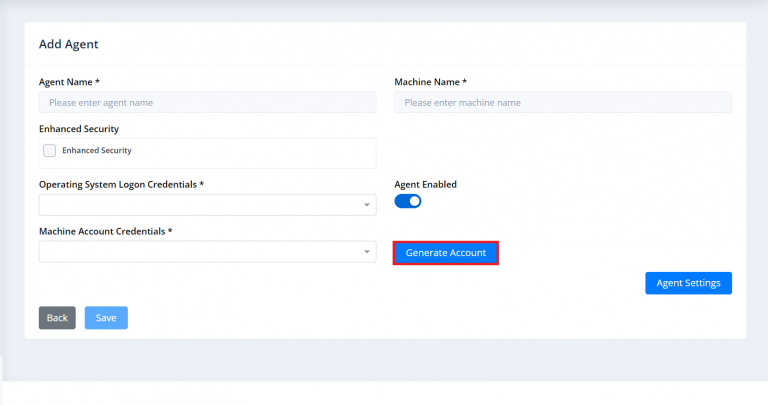
- Open OpenBots Agent. Enter the user name and password indicated when Agent was created. Enter the Server URL associated. Logging setting can be modified as needed, the Http field is generated at time of connection.
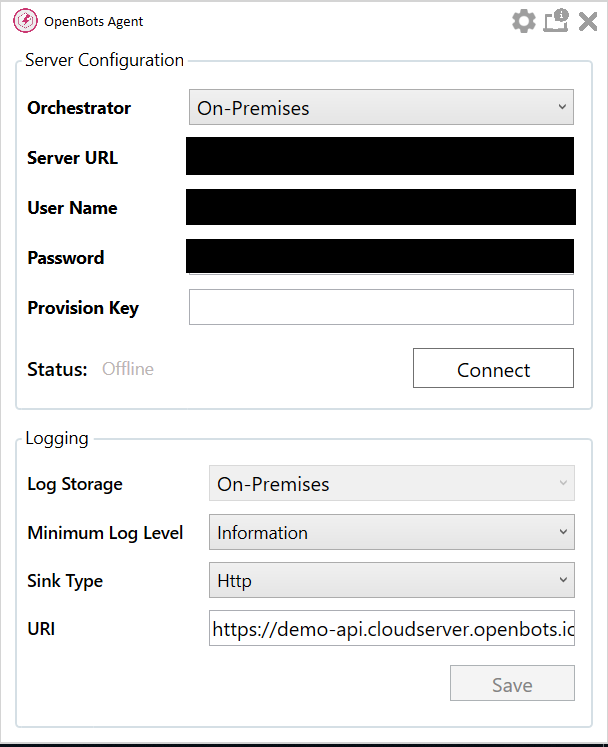
- Click ‘Connect’.
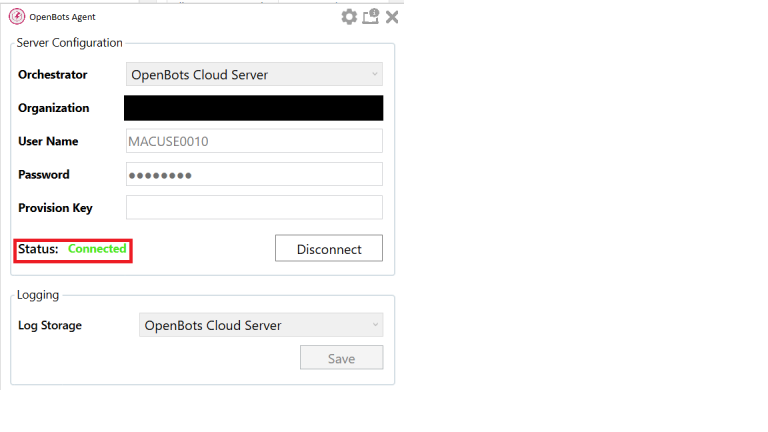
The ‘Connected’ status indicates that Agent is successfully connected to Server.