Objective
The objective of this How-To guide is to create and open multiple workbooks in Excel using the Create Excel Application command and then write data to those instances. Most processes require utilization of Excel to load or update data according to the project’s specific requirements and this guide will help to demonstrate how to handle multiple workbooks being open at once. OpenBots Studio enables the user to create multiple instances of Excel and use those instances to call or access multiple Excel files throughout an entire process.
Walkthrough
The following are the steps involved in creating or accessing multiple Excel workbooks in OpenBots Studio. It is a procedure that involves click level operations from the Excel command list.
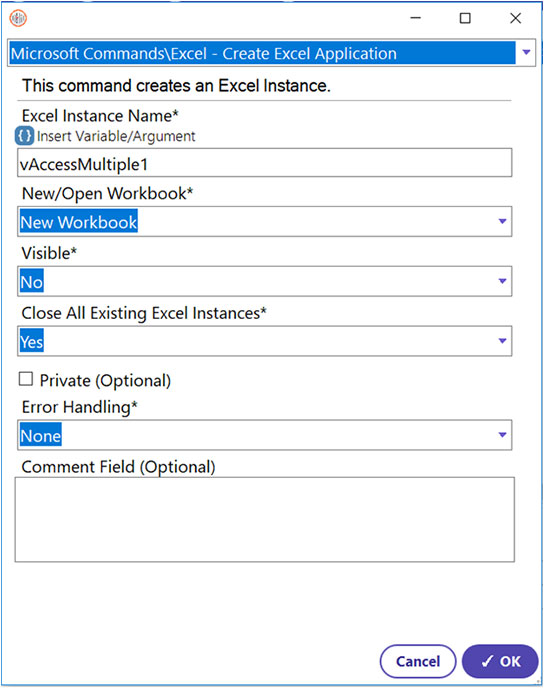
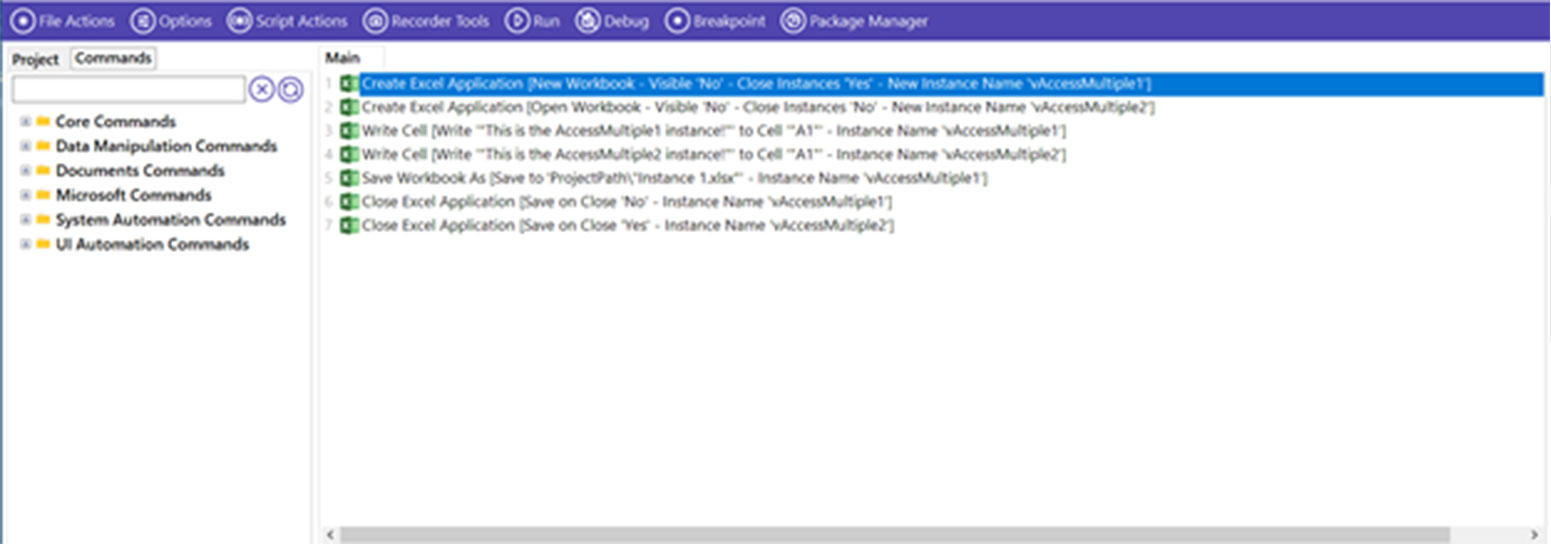
Step 1: To access an Excel file throughout the entire process, a global instance must be created first so that automation can differentiate between different Excel windows (if multiple are created). The Create Excel Application command helps in performing this task. The first workbook will be a completely new file created just for this guide.
  • Select the Create Excel Application command.
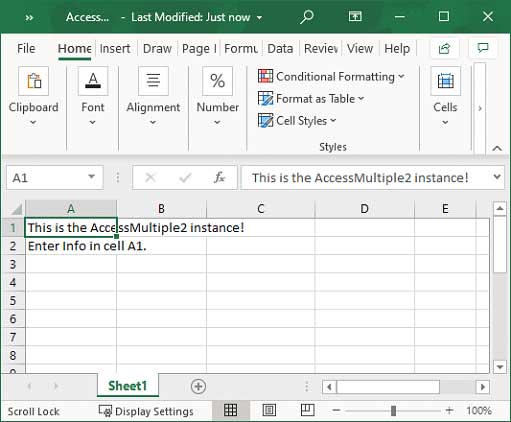
  • Enter the Excel Instance Name. (This is the variable used to identify the Excel file opened by this command. The instance name for this workbook will be vAccessMultiple1 since this is the first workbook. This instance variable will be associated with this workbook only.)
  • For the New/Open Workbook field, select the “New Workbook” option.
  • Select the visibility criteria. (Yes, to make the Excel window visible during process execution. No was chosen for this guide.)
  • Select whether to close all existing Excel instances. (Yes was chosen so that any open Excel files will be closed in order to prevent errors if the application is run multiple times.)
  • Click OK

Note: If this automation is to be run multiple times, the Excel file created by this command will need to be deleted beforehand because later on the automation will attempt to save a file with the same name as a pre-existing file.

Step 2: Because the purpose of this guide is to demonstrate how multiple workbooks can be interacted with, another workbook is needed. This means that another workbook needs to be created or opened. In this case, a workbook will be opened. The file opened using this command is just a workbook with only one cell. That cell is located in A2 and only says “Enter info in cell A1.” This is so that it can be differentiated from the other workbook created in Step 1.
  • Select the Create Excel Application command.
  • Enter the Excel Instance Name (This will differentiate it from the first workbook. vAccessMultiple2 was used for this guide.)
  • For the New/Open Workbook field, select the “Open Workbook” option. (This will open a new Workbook File Path field.)
  • In the Workbook File Path field, enter the file path for the file. (It is best practice to keep files needed for a process in the project folder because that makes it easier for the automation to find the file.)
  • Select the visibility criteria. (Yes, to make the Excel window visible during process execution. No was chosen for this guide.)
  • Select whether to close all existing Excel instances. (No was chosen so that the workbook created in the previous step is not closed since it is needed for this guide.)
  • Click OK
Step 3: Now that both files are open, they can be written to. First, the file that was created in Step 1 will be edited. This will be done with the Write Cell command.
  • Select the Write Cell command.
  • Enter the Excel Instance Name of the first file that was created. This instance variable is what specifies the workbook that this command will be executed within. (vAccessMultiple1)
  • In the Cell Value field, write a message that indicates that this is the first file that was created.
  • In the Cell Location, enter whatever location desired.
  • Click OK
Step 4: The file that was opened in Step 2 will be edited next. Again, this will be done with the Write Cell command.
  • Select the Write Cell command.
  • Enter the Excel Instance Name of the second file that was opened. This instance name is what specifies the workbook that this command will be executed within. (vAccessMultiple2)
  • In the Cell Value field, write a message that indicates that this is the second file that was opened.
  • In the Cell Location, enter A1 since that was the location specified in the file itself.
  • Click OK
Step 5: After the files have been edited, they can be saved. However, the workbook created in Step 1 does not have a name yet because it didn’t exist until it was created by the automation itself. This means that the Save Workbook As command will be needed to provide the file with a name.
  • Select the Save Workbook As command.
  • Enter the Excel Instance Name. (vAccessMultiple1)
  • In the Workbook Location field, enter the desired file path.
  • In the Workbook File Name field, enter the desired file name. (Be sure to include the file extension.)
  • Click OK
Step 6: After saving the file with a name, it can be closed using the Close Excel Application command.
  • Select the Close Excel Application command.
  • Enter the Excel Instance Name. (vAccessMultiple1)
  • Set the Save Workbook field as “No” since it was just saved with a name.
  • Click OK
Step 7: The second workbook can now be closed using the Close Excel Application command. It doesn’t need to be saved using the Save Workbook As command because the file already possessed a name, and it can be saved using the Close Excel Application command anyway.
  • Select the Close Excel Application command.
  • Enter the Excel Instance Name. (vAccessMultiple2)
  • Select to save the workbook before closing or not. (Yes)
  • Click OK
Note: The files created and opened by this guide will look like the pictures shown below.
All the commands in this guide can be utilized alongside many of the other commands that will be discussed in later guides. Below is a snapshot containing the commands used to create and access multiple Excel files in this guide.
Commands utilized for the above concept (creating & accessing multiple Excel workbooks) are as follows:

Excel Commands: Create Excel Application, Write Cell, Save Workbook As, Close Excel Application.

Newsletter Bot

Lets stay in touch!

Join our weekly newsletter and follow us on social media.

Contact Sales
Call Our Experts!