Objective
The objective of this How-To guide is to assist the users with extracting data from a Word document and appending it to another document. Then the next step is replacing the text values with user defined data in the appended document. The document will be converted to the PDF format before terminating the process. The commands in this process can be applied to many types of scenarios!
Walkthrough
The following are the steps involved in extraction of data from a Word document and loading that data into another Word document. It is a procedure that involves click level operations from the Word command list.

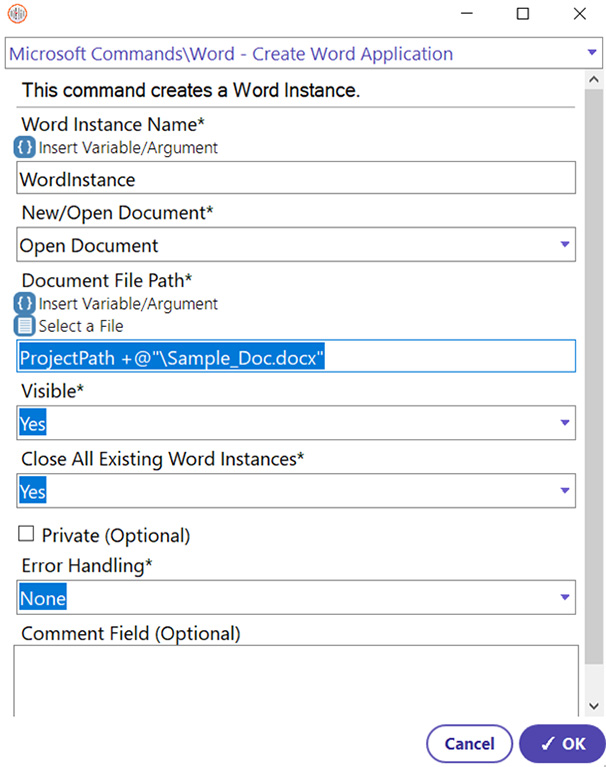
Step 1: To open a Word Document, select the Create Word Application Command.

  • Select Create Word Application Command
  • Enter Word Instance name (Variable used to identify the Word file opened by this command) (Example: WordInstance)
  • Under ‘New/Open Document’, select ‘Open Document’.
  • Select the file to open. The file, named Sample_Doc, was saved in the automation project file in this guide.
  • Visibility (To make the Word file visible while execution) (Yes)
  • Close all existing Word instances (Yes)
  • Click OK
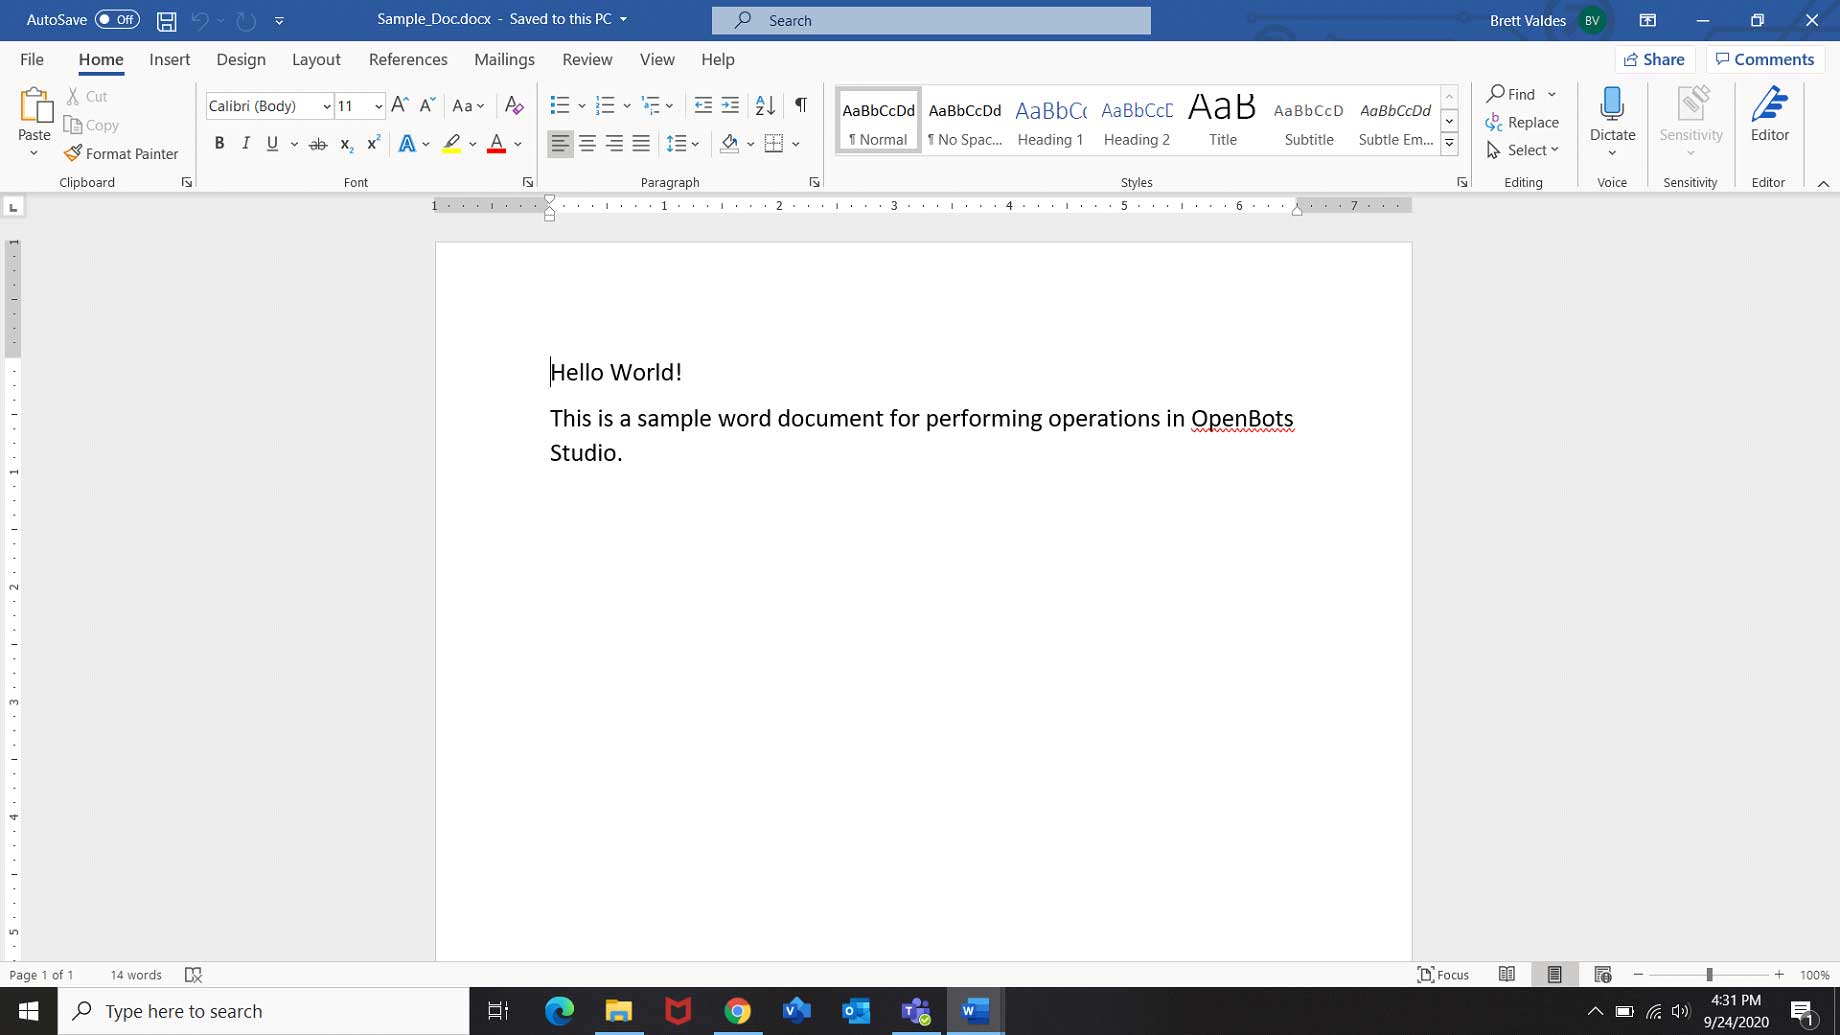
The Word document accessed would be displayed like below.

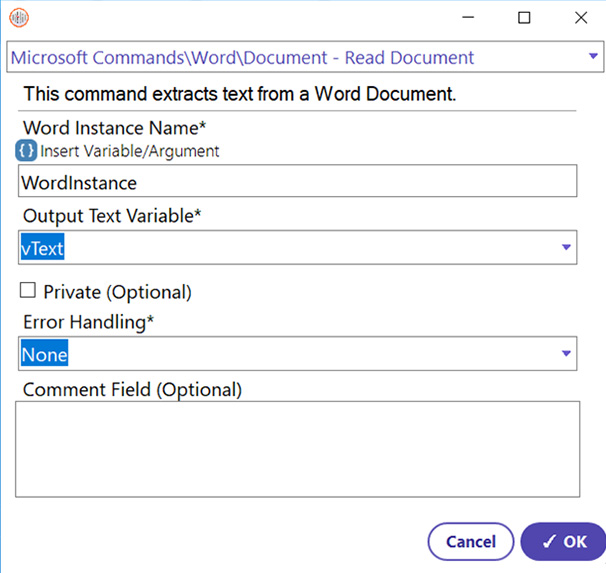
Step 2: After accessing the document, the data available in the Word file needs to be read so that it can written down later. The Read Document command extracts the data from a Word file and stores it in a variable to be used later.

  • Select Read Document Command
  • Enter the Word instance name (WordInstance)
  • Enter the output text variable name {vText}

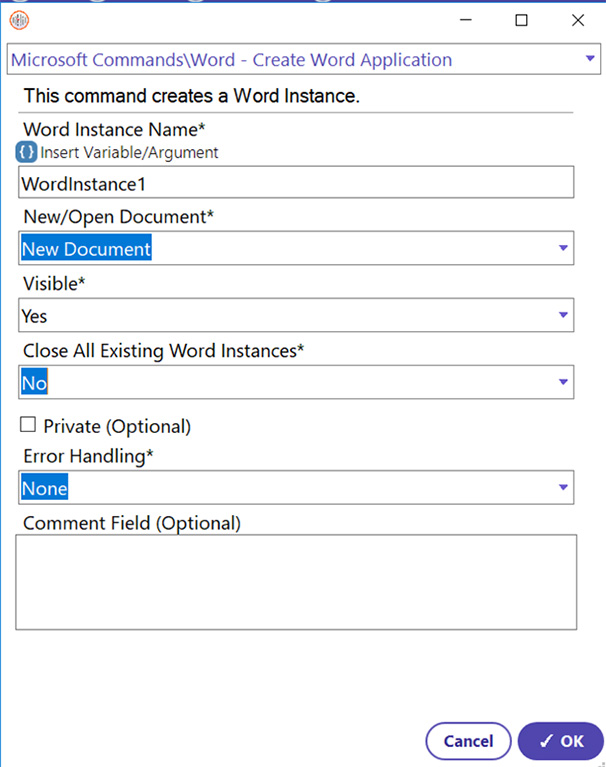
Step 3: Now, a new Word Document will be needed to write the text from the previous Word Document (Sample_Doc). Use the Create Word Application Command.

  • Select Create Word Application Command
  • Enter Word Instance name (Variable used to identify the Word file opened by this command) (Example: WordInstance1)
  • Under ‘New/Open Document’, select ‘New Document’.
  • Visibility (To make the Word file visible while execution) (Yes)
  • Set ‘Close all existing Word instances’ to ‘No’. If set to ‘Yes’, it will close the Sample_Doc Word Document.
  • Click OK

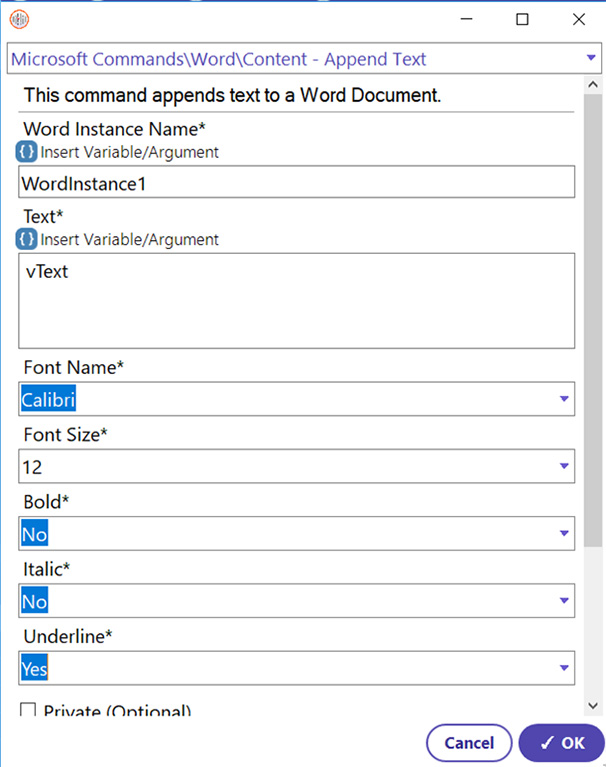
Step 4: In order to load the extracted data from the previous Word document into another document, the Append Text command is used. The {vText} variable will be created within the Read command and will be used to store the text value extracted earlier. (Refer to Semi-complex Word guide: Loading data into Word to understand the command functionality.)

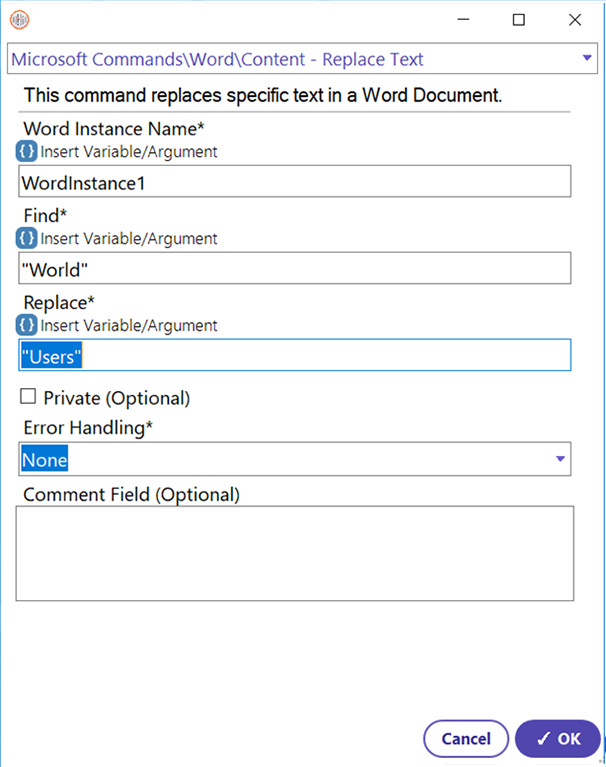
Step 5: After loading the data into the new Word file, the specific text value is updated and changed to a different value (different text) using the Replace Text command. This will replace all instances of a specific Word all over the document with the Word that the user provides.

  • Select Replace Text command
  • Enter the Word instance name (WordInstance1)
  • Enter the text to update (Find: “World”)
  • Enter the replacing text (Replace with: “Users”)
  • Click Ok
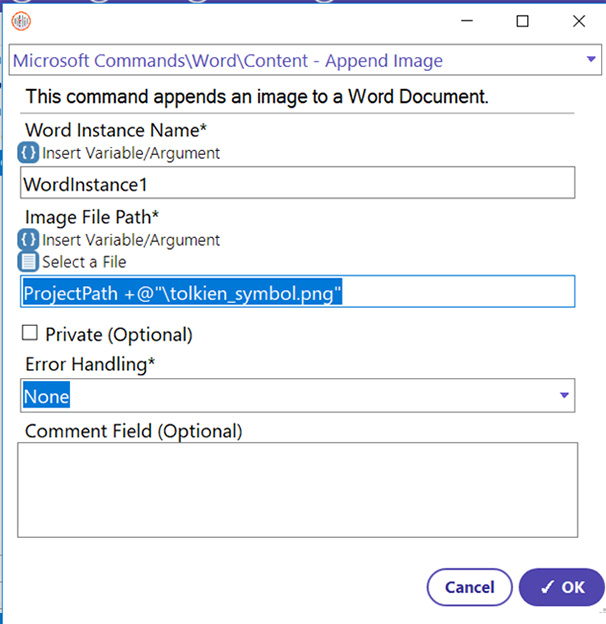
Step 6: Append an image to the Word document using the Append Image command. (Refer to Semi-complex Word guide: Loading data into Word to understand the command functionality.)
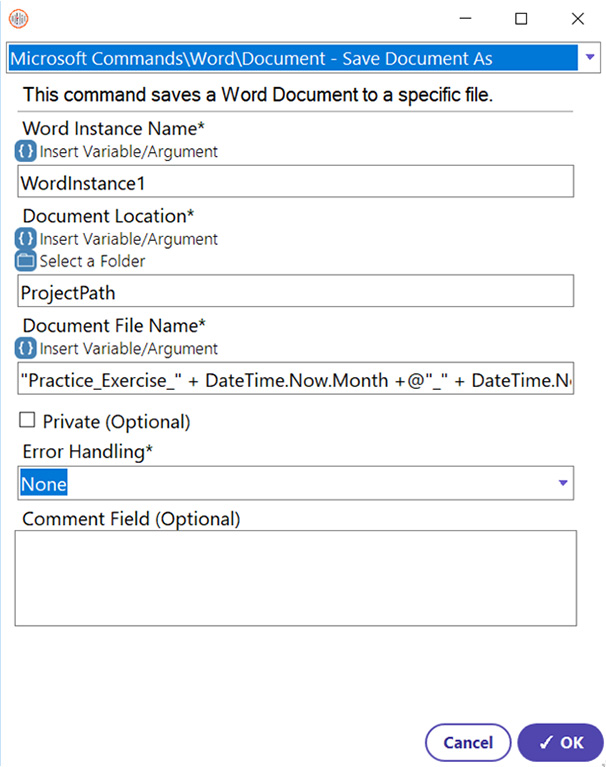
Step 7: Once the Word document has been appended with data and edited, it is ready to be saved. The Save document as command will save the document with a new name.
  • Select Save Document as Command
  • Enter the Word Instance name (WordInstance1)
  • Select the location/path to save the file
  • Enter the document file name (Practice_Exercise_MM_DD_YY). The variables used in the name will automatically write the date the automation ran on the document name. This is a neat trick to date stamp your documents!
  • Click OK
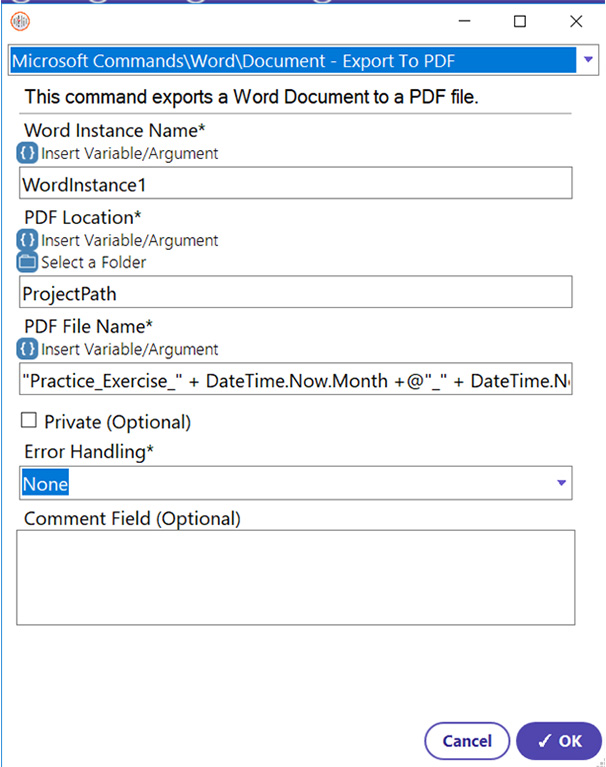
Step 8: After saving the document, it must be processed and converted into a PDF file. The Export To PDF command does this by exporting any Word document provided to it as a PDF file.
  • Select Export to PDF Command
  • Enter the Word instance name (WordInstance1)
  • Select the location/path to save the PDF
  • Enter the name for the PDF file. (Practice_Exercise_MM_DD_YY)
  • Click OK
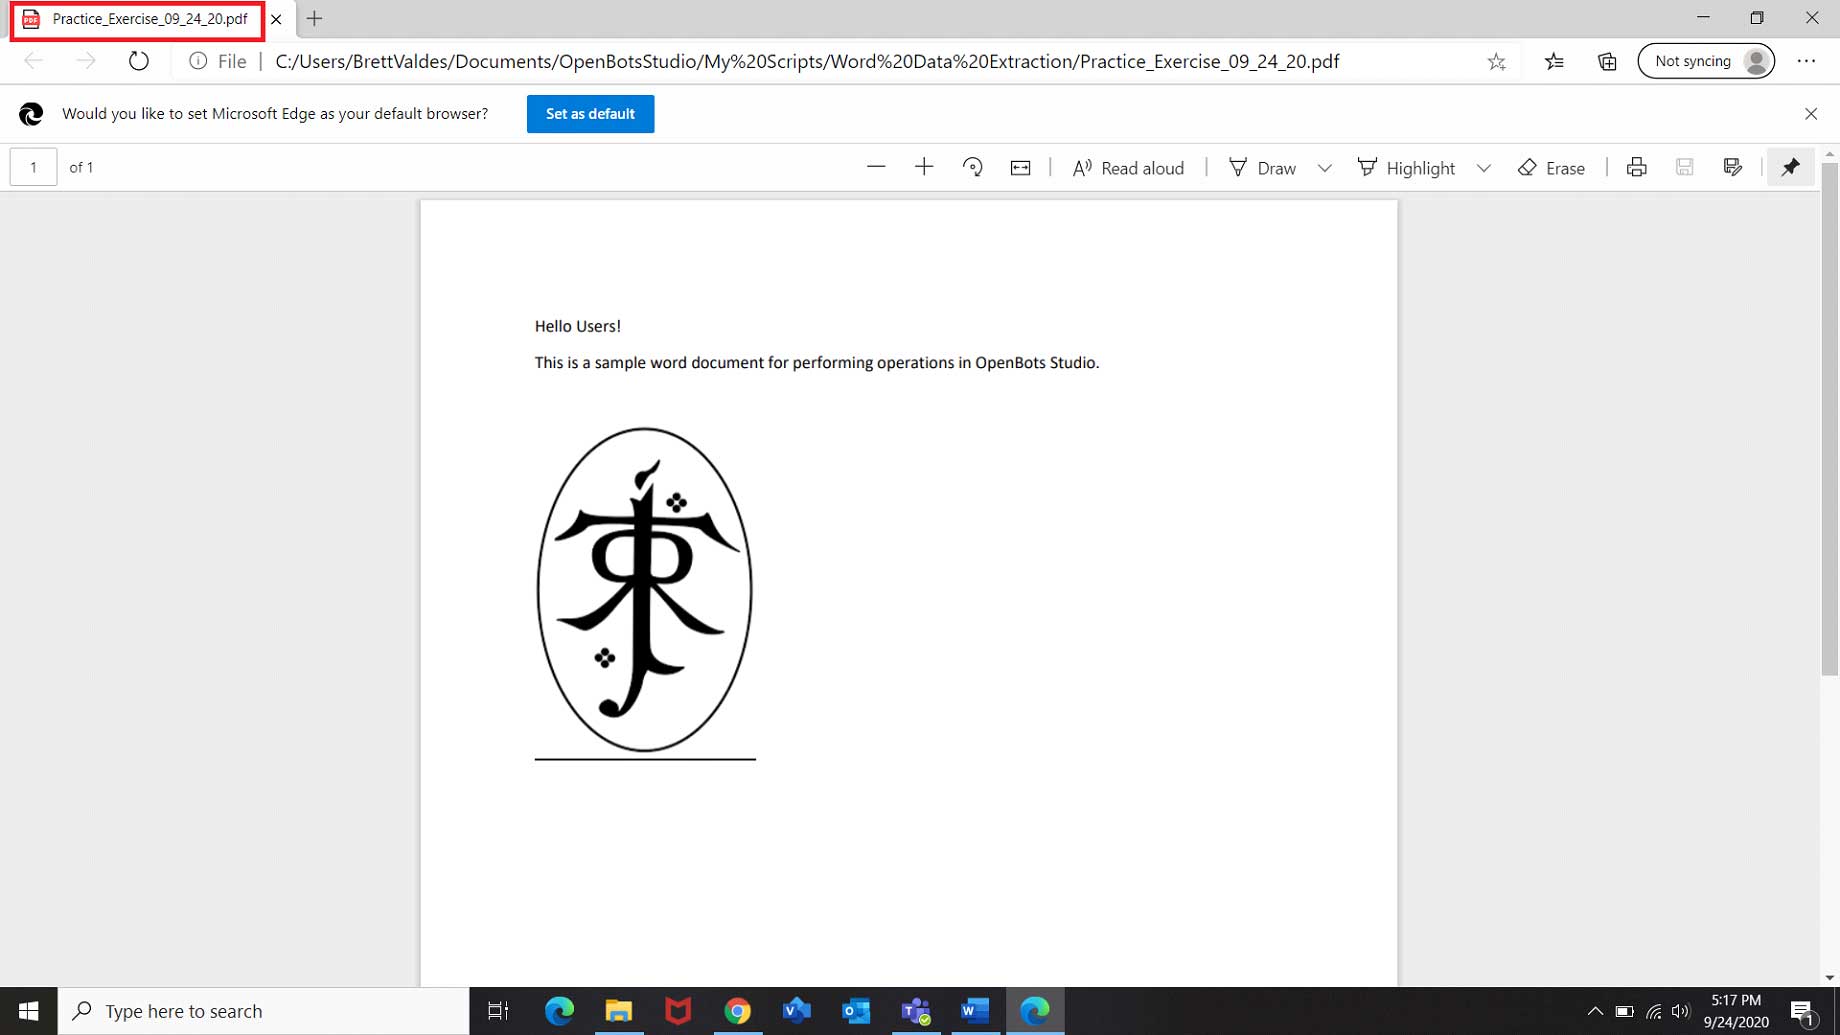
The PDF generated would be displayed like below. If you notice the name of the file, it has the date the automation was ran!
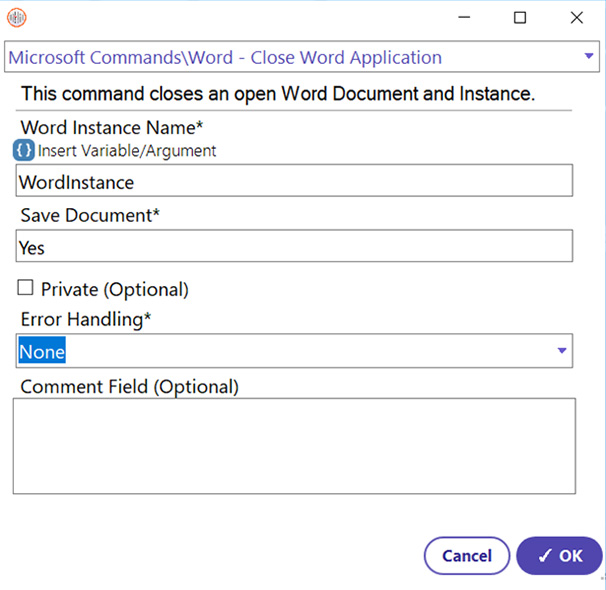
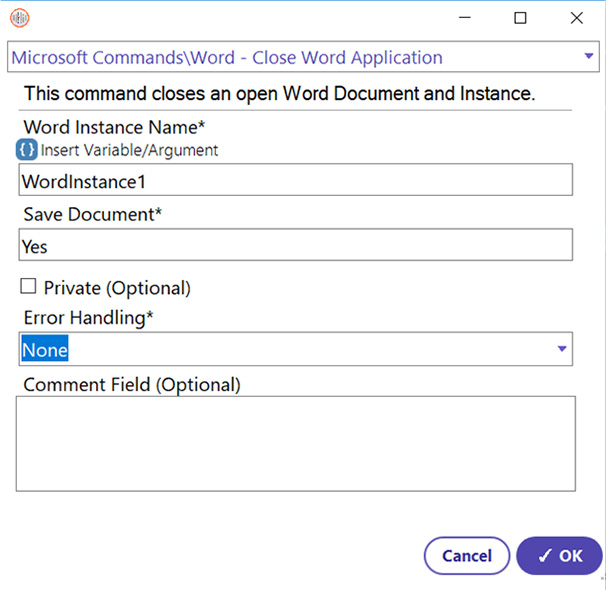
Step 9: Once the PDF file is generated and the Word document finished with all of the operations, it is required to close the Word Documents. This helps to avoid having the process execute in the background which might lead to errors and bugs while opening the document or while re-executing the process.
  • Select Close Word Application Command
  • Enter the Word instance name (WordInstance for Sample_Doc, WordInstance1 for Practice_Exercise)
  • Select to save the document before closing or not (Yes)
  • Click OK
All the commands in this guide can be utilized alongside many of the other commands that will be discussed in later guides to perform several operations on Word document. Below is a snapshot of the process discussed in the guide.
Commands utilized for the above concept (Data Extraction & PDF conversion in Word document) are as follows:

Word Commands: Create Word Application, Read Document, Append Text, Replace Text, Append Image, Save Document As, Export to PDF, Close Word Application.

Newsletter Bot

Lets stay in touch!

Join our weekly newsletter and follow us on social media.

Contact Sales
Call Our Experts!