Objective
The objective of this How-To guide is to assist the users in loading different types of data into a Word document using OpenBots Studio. The commands used in this guide can be applied to many different types of processes and scenarios.
Walkthrough
The following are the steps involving loading data into a Word document using OpenBots Studio. This procedure involves click level operations from the Word command list.
Step 1: To open a new Word file, use the Create Word Application Command
  • Select Create Word Application Command
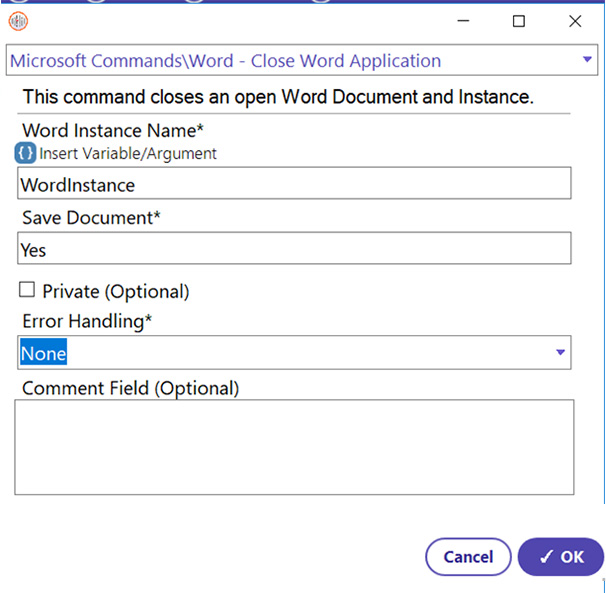
  • Enter Word Instance name (Variable used to identify the Word file opened by this command) (Example: WordInstance)
  • Under ‘New/Open Document’, select ‘New Document’
  • Under ‘Close All Existing Word Instances’ select ‘Yes’ (Default). If the user wants to close all Word instances open on the system. Keep in mind that it will close all the Word application including the ones that are open separately.
  • Click OK
Step 2: Next, use the Append Text Command. Once the document has been opened, it will be appended with sample text using the Append Text command. It will add specific text that the user will specify using appropriate font, size, and other attributes.
  • Select Append Text Command
  • Enter the Word instance (WordInstance)
  • Enter the text value to be appended: Hello World!
  • Select the Font Name. The default is Calibri
  • Select the Font size
  • Select for bold text (optional)
  • Select for Italic text (optional)
  • Select if text needs to be underlined (optional)
  • Click OK
Step 3: To append an image to the document, choose the image from the file system by using the Append Image command from the category. It will add the image below the text appended before.
  • Select Append Image command
  • Enter the Word instance used (WordInstance)
  • Select the image file path from the system. For this example, the image is in the Project Folder.
  • Click OK
Another Append Text command will be added into the process after the Append Image to showcase the successful load of both text & image into the Word document.
Step 4: Next, a data table will be loaded into the Word file using the Append Data Table command. (Refer to the Basic Data Table Guide to learn more about the commands associated with Data Tables)
  • Select Append Data Table command
  • Enter the Word instance (WordInstance)
  • Enter the Data Table variable/instance {DataTable}
  • Click OK
Step 5: Once the Word document has been appended with data and edited, it is ready to be saved. The Save Document As command will save the document with a new name.
  • Select Save Document As Command
  • Enter the Word Instance name (WordInstance)
  • Select the location/path to save the file
  • Enter the document file name (New name to be used to save the document) (Loaded_Doc)
  • Click OK
The following Word document is generated during this process.
Step 6: Once the document has been saved, closing the Word application is required. This helps to avoid errors and bugs while opening the document created or when re-executing the process.
  • Select Close Word Application Command
  • Enter the Word instance name (WordInstance)
  • Select to save the document before closing or not (Yes or No)
  • Click OK
All the commands in this guide can be utilized alongside many of the other commands that will be discussed in later guides to perform several operations on Word document. Below is a snapshot of the process discussed in the guide.
Commands utilized for the above concept (Loading data in Word document) are as follows:

Word Commands: Create Word Application, Append Text, Append Image, Append Data Table, Save Document As, Close Word Application

Newsletter Bot

Lets stay in touch!

Join our weekly newsletter and follow us on social media.

Contact Sales
Call Our Experts!