Home Platform Openbots Server Connecting Server & Agent

Connecting Server & Agent

What is OpenBots Agent?
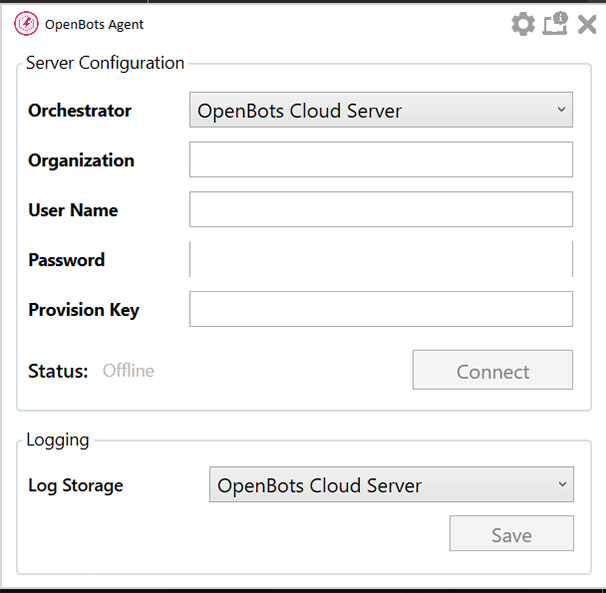
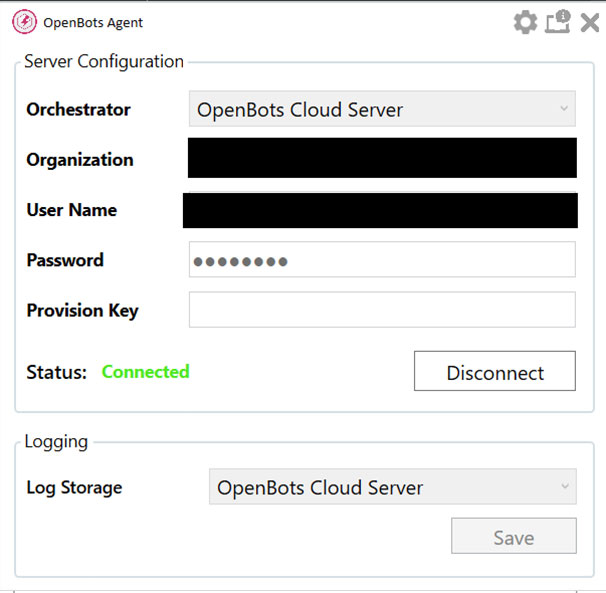
OpenBots Agent is a separate application that can be installed alongside OpenBots Studio and acts as a connection between the user and an OpenBots Server instance. The Agent connects the user to OpenBots Server and allows for interactions between OpenBots Server and OpenBots Studio to take place. With the connection between the two established, OpenBots Studio can use its Asset, Credential, and QueueItem commands (which will be explained in future documents) to perform any necessary tasks in the OpenBots Server. Without a proper connection to an OpenBots Server through the OpenBots Agent, none of the commands listed previously will execute successfully.
Why would someone want to use OpenBots Agent?

Because OpenBots Server acts as a tool that allows team members to create jobs, set schedules for processes, add QueueItems, add files, as well as manage different kinds of assets; being able to interact with it is very important. The connection established by OpenBots Agent allows for OpenBots Studio to gain access to information that it would not be able to access otherwise. For example, imagine that there is a process that requires the use of a file that is not located on the local machine that the process will be running on for security purposes. The team that is working on the process can upload the file to OpenBots Server and, because of the connection made by the OpenBots Agent, OpenBots Studio can use its Asset commands to access and utilize said file.

The All Agents field in OpenBots Server also allows users and administrators to view the number of agents that have been connected to their instance of OpenBots Server. The status and health of the agents can be viewed as well as the jobs that the agent has run. Lastly, the agents can be enabled/disabled, edited, and deleted all within this tab.

But how does one set up OpenBots Agent and connect it to OpenBots Server?

Setup
When downloading OpenBots Studio, there will be an option to download OpenBots Agent as well which should be checked by default. For now, OpenBots Agent does not need to be opened because the credentials for the tool must be created first. Credentials for OpenBots Agent can be created through the OpenBots Server. Those credentials are then utilized to authenticate your OpenBots Agent with the OpenBots Server. Now the connection between OpenBots Server and Agent can finally be established.

Step 1: The first step is to access an OpenBots Server. Log into OpenBots Server using your email and password. (If you have not requested access to OpenBots Server, please do so using the ‘Request Access’ link below the Login button. Team members with admin priviledges can approve access to Server by using the ‘Team’ tab in Server and accepting the request via the ‘Pending Approvals’ option.)

Step 2: Once a Server has been accessed, navigate to the Credentials tab on the side and click on the Add Credential dropdown. This will bring up the ‘Add Credential’ page as seen below. The credentials in this page help to establish a connection between the OpenBots Agent and the user’s computer.

  • In the Name field, enter the name that these credentials will be associated with. Make sure to use a unique and easily identifiable name like (Your Name/Application Name) Credentials.
  • The Provider field is special. The option selected here depends on the type of credentials that need to be created. Because the type of credentials needed for this guide are credentials for an agent, the Active Directory option is needed.
    • The other Provider type, Application, is used to store credentials for different applications. This is so that OpenBots Studio can pull credentials from Server and use said credentials in an automation as necessary. These credentials can be updated as many times as needed in Server and Studio will always pull the most up-to-date version of said credentials.
  • In the Domain field, enter the Active Directory domain name for the user, or simply the Hostname of the device that the agent will be located on if Active Directory is not utilized. The Hostname can be found by opening the OpenBots Agents and clicking the Get Machine Info button.
  • The Get Machine Info button will also provide the currently logged in user that the OpenBots Agent will be running on. This is what will be placed in the Username field.
  • In the Password Secret field, enter the password that is needed to log onto the computer that OpenBots Agent will be running on. Note that the Password Secret field requires the actual password associated with the account on the computer. The field will not accept a PIN or any other kind of security log in feature/code.
  • Finally, enter the Start Date and the End Date. These dates determine how long these credentials will be valid for. If the credentials are not updated with the dates specified, then they will no longer be valid when accessed by OpenBots Studio or any process that utilizes them.
  • Click the Save button and these credentials are now ready to be tied to OpenBots Agent!

Step 3: Now that the credentials have been created, an agent must be added to the OpenBots Server and tied to the credentials that were just created. This is done by navigating to the Agents dropdown and selecting the ‘Add Agent’ option. The agent created in OpenBots Server will contain the information needed for the Agent installed on the computer to establish a stable connection between Server and your computer. This connection will be utilized to run the server integration commands, as well as execute scheduled processes remotely from the server.

  • In the Agent Name, enter the name that will be associated with this Agent. Make sure that the name is descriptive.
  • In the Machine Name, enter the Machine Name that is shown when accessing he Machine Info window in OpenBots Agent. This is just so that this agent can tie itself to OpenBots Agent installed on the machine specified.
  • The Machine Info window should have also provided the MAC Address that will be placed into the appropriate field. Enter it. The MAC Address (or Media Access Control Address) is the unique identifier that your device uses to interface with anything that may grant it access to the internet. This is a security measure so that if your IP address changes (like with a Dynamic IP Address), the network can still identify your device.
  • The same goes for the IP (V4) Address. Enter the information into the correct field.
  • In the Operating System Logon Credentials, select the credentials that were created in the previous step. This will allow the agent to use the credentials created to execute scheduled processes on the OpenBots Agent.
  • The Enabled button distinguishes whether or not the Agent will be enabled or disabled for the purposes of scheduling jobs to run.
  • Click on the ‘Genarate Account’ button in order to generate a Username and Password that will be used to establish the connection between the Agent and Server. You can use the icon to the right of each one to copy the generated values to the clipboard so that you can then pass them to the Agent. These are not the same user name and password that were used for the credentials. These will be entirely unique to OpenBots Agent.
  • Click the Save button and then open OpenBots Agent.

Step 4: Finally, it is time to input the information into OpenBots Agent and connect it to the OpenBots Server. This will establish the connection between all 3 applications.

  • With OpenBots Agent open, enter the user name and password that were generated by Server.
  • If using the ‘On Premises’ version, open OpenBots Server and log in if necessary. While in OpenBots Server, extract the URL at the top of the page (up until the .net/.com) and place it in the Server URL field. If using Cloud version, type in the Organization in the provided field.
  • The Logging section will be covered in a separate document. For now, it can be left alone.
  • Click the Connect button and the connection will be established!
With the connection established, feel free to test out some of the different OpenBots Studio commands previously mentioned above to ensure that the connection has been properly established. Also feel free to check out the Publishing a Process to the Server guide as well as the Scheduling a Process to Run guides to learn more about how OpenBots Studio interacts with OpenBots Server. This marks the end of this tutorial.
Newsletter Bot

Lets stay in touch!

Join our weekly newsletter and follow us on social media.

Contact Sales
Call Our Experts!