Home Platform Openbots Server Server Installation and Setup

Server Installation and Setup

How does one install OpenBots Server?

This tutorial is for anyone that does not have any experience with installing applications on servers or any experience with SQL.

Step 1: Before OpenBots Studio can be installed on a Windows 10 machine, a user must install their Internet Information Services if they have not done so already. To do this, in your Windows 10 Search Bar, type “Turn Windows features on or off.” When the window opens, select “Internet Information Services”, and then click OK. This will install the IIS and allow the installation process to begin as well as avoid several errors later down the line.

Step 2: OpenBots Server can be installed fairly easily. The next step would be to download the installer from this portion of the website (https://openbots.ai/product/openbots-server/) by clicking the “Get OpenBots Server” button. Once the file has been downloaded, run the installer.

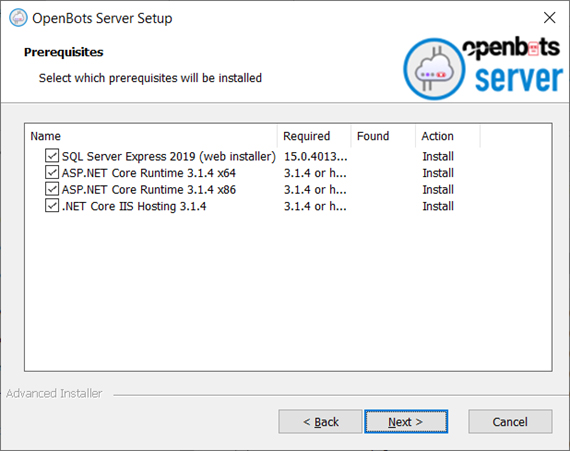
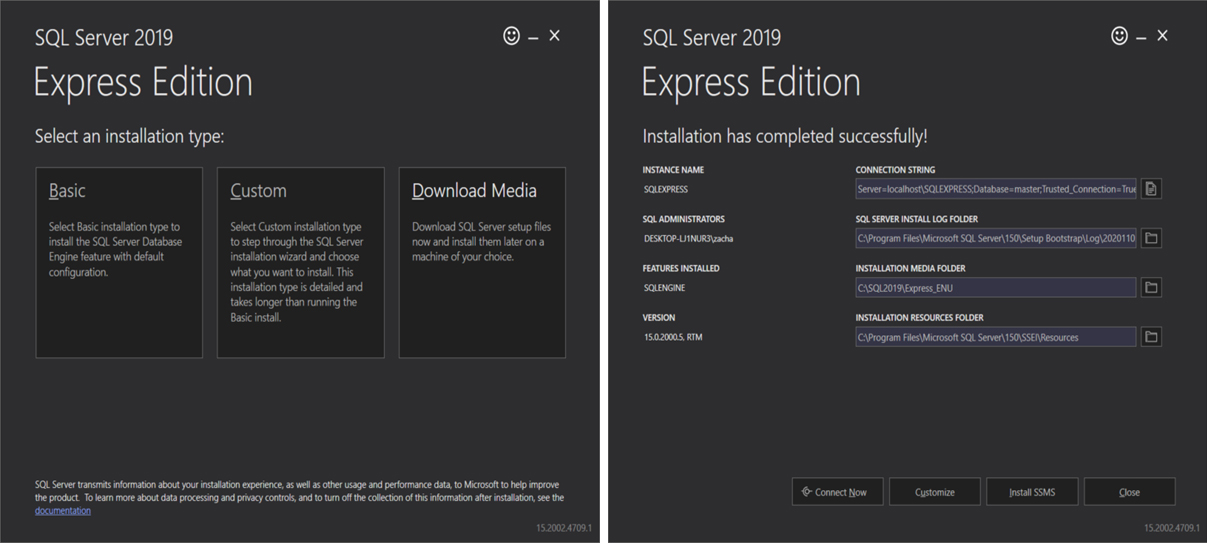
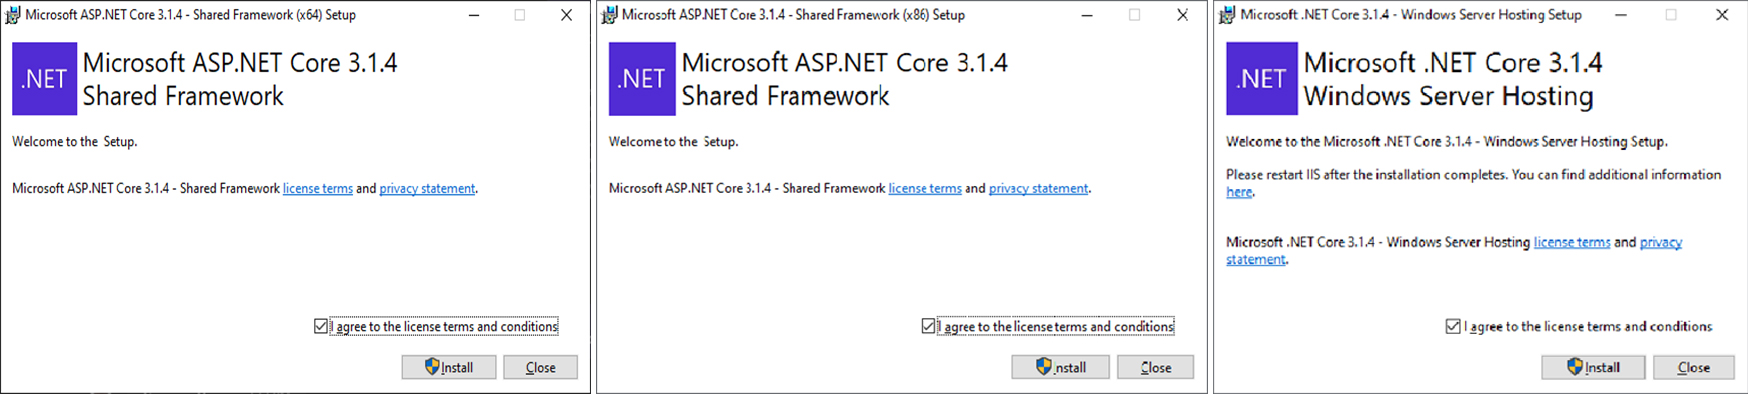
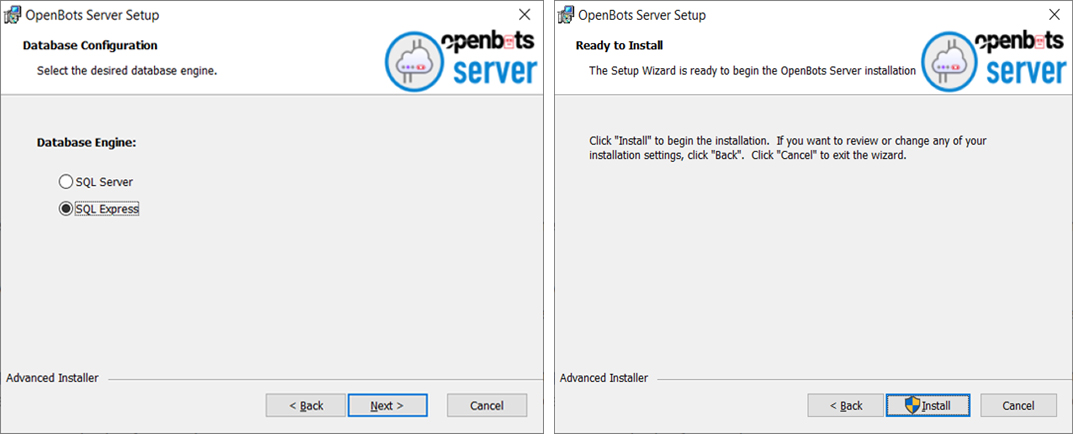
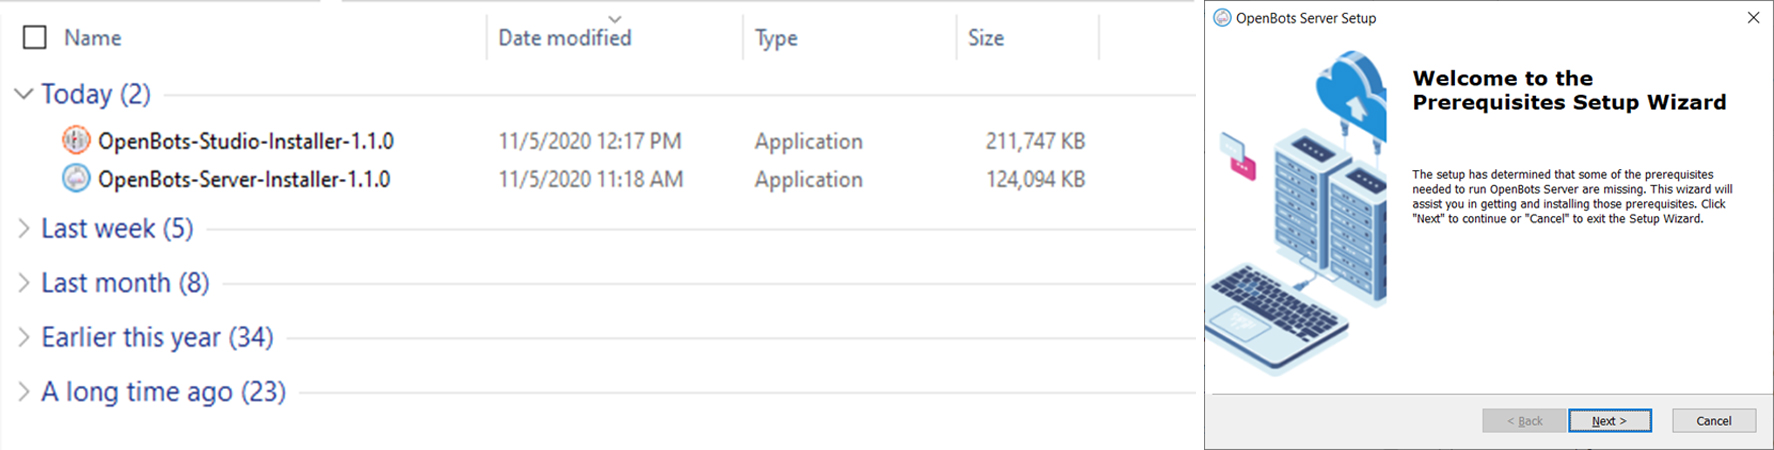
Step 3: After starting the installer and clicking the “Next” button, a list of prerequisites that need to be installed will appear. The installer will automatically detect which prerequisites are already installed and will not display them. These prerequisites can be installed as necessary but do note that if the user already possesses a Windows Server/SQL Server, then the “SQL Server Express 2019 (web installer)” prerequisite can be skipped. This tutorial will walk through the steps necessary to install the “SQL Server Express 2019” prerequisite. Select all of the necessary options and click the “Next” button.

Step 4: If “SQL Server Express 2019” was selected as a prerequisite, then the window below should appear. For the purposes of this tutorial, the “Basic” option will be selected. If the user wishes, the other options can be selected but the steps will not be covered in this tutorial. Once the license agreement has been agreed to, select the install location, and click the “Install” button. After the program is done installing, the completion window will appear with fields such as “Connection String”, “SQL Server Install Log Folder”, “Installation Media Folder”, and “Installation Resources Folder.” These folders can be customized as necessary and the information can be saved for later use but editing them is not necessary for this guide. Close this window.

Step 5: The rest of the prerequisites will then proceed to their respective installation steps. Install the rest of the prerequisites.

Step 6: Once the prerequisites have been installed, the “OpenBots Server Setup” window should change to the first window below. If the window is no longer open/was closed, then run the installer again. Click the “Next” button and then agree to the license agreement on the new page and click the “Next” button.

On the “Installation Folder” page, select the location for the installation folder (the default folder location is fine) and then click the “Next” button.

The next page should be the “Database Configuration” with two “Database Engine” options. Select the “SQL Express” option. This is because of the prerequisite that was installed earlier. Once it is selected, click the “Next” button.

The last page should be the “Ready to Install” page. Click the “Install” button to start installation. If an error is encountered during installation, proceed to Step 7. Otherwise, skip to Step 10.

Step 7: The most common error to appear would be the error seen in the first image below. The second image is what appears after the first error occurs. When this error occurs, it will cause the installer to close. Keep it closed for now. This error is caused by the fact that OpenBots Server needs access to Windows Pro features that may not be available on the user’s specific version of Windows. In order to resolve this error, the features need to be installed. This can be done by installing the features using the command prompt. Move on to Step 8.

Step 8: In order to install the features, the file that contains the features is needed. To find the file, open File Explorer and navigate to the Windows folder, then the Servicing folder, and then finally the Packages folder (C:\Windows\servicing\Packages). In this folder, locate the file with the name Microsoft-Windows-IIS-WebServer-AddOn-2-Package. Be sure to pick the file with the most recent “Date Modified” value. Copy the name of the file.

Step 9: Search for the Command Prompt in the Search Bar, right-click it, and then run it as an administrator. Then, in the Command Prompt, enter dism /online /norestart /add-package:%SystemRoot%\servicing\Packages\*file*.mum

Next, press the “Enter” button on the Command Prompt and it should install the proper file. Run the installer again and it should install properly. Close the Command Prompt and navigate to Step 10.

Step 10: Once OpenBots Server has been fully installed, there are a few more steps that need to be performed. In the Windows Search Bar, search “Services” and open the application. Then navigate to “SQL Server (SQLEXPRESS)”, right-click it, and then select “Restart.”

Next, in the Windows Search Bar, search for IIS and open the corresponding application. In this application, click the “Restart” button in the “Manage Server” section within the right sidebar. The user can also restart their computer to perform the same task. Move on to Step 11.

Step 11: Upon installation, the Server may be unable to save files uploaded to the Server due to a lack of permissions to the installation path.

Navigate to the installation folder (C:\Program Files (x86)\OpenBots Inc.\ in the case of this tutorial), right click on the OpenBots Server folder and select “Properties”.

Click on the “Security” tab and then click the “Edit” button. This will bring up a new “Permissions” window. Click the “Add” button. This too will open another window.

In this new window type “IIS_IUSRS” first and then press “Check Names” (Do NOT forget the underscore). When “Check Names” is pressed, it will add the name of the user’s computer before the message that was typed. Press “OK”. This will close the window.

Back in the “Permissions” window, select “Full Control” in the permissions pane for the “IIS_IUSRS” group and press “Apply” and then “OK”. Press “Apply” and then “OK” on the rest of the windows in order to close the windows. The server should now be able to properly save uploaded files. OpenBots Server can now be accessed by navigating to http://localhost:81/.

This marks the end of the tutorial.

Newsletter Bot

Lets stay in touch!

Join our weekly newsletter and follow us on social media.

Contact Sales
Call Our Experts!