Home Platform Openbots Server Using Queues for Transactions

Using Queues for Transactions

What is a queue?
Queues are a way to work on multiple different items in an automation sequentially (according to priority) while also keeping track of their progress on the OpenBots Server. This is done using Queue Items. Queue Items, as the name implies, are the individual items in a queue that are worked in order of their priority (which is set in OpenBots Studio or Server). A queue will work on/execute each queue item within it and will record the status of each item within the Queue Items tab. Queues are great for projects that involve a lot of items/tasks that need to be worked. A great example would be editing Excel sheets. Each row that needs to be worked can be added as a Queue Item and, once the automation steps in OpenBots Studio are completed, the items can be worked, and Server will inform the user of any errors that occur on specific queue items. This helps users to keep track of which queue items ran into issues and can help diagnose said issues by displaying information in the Queue Items tab where the Watch button can be toggled to view live information.
How does a queue work?
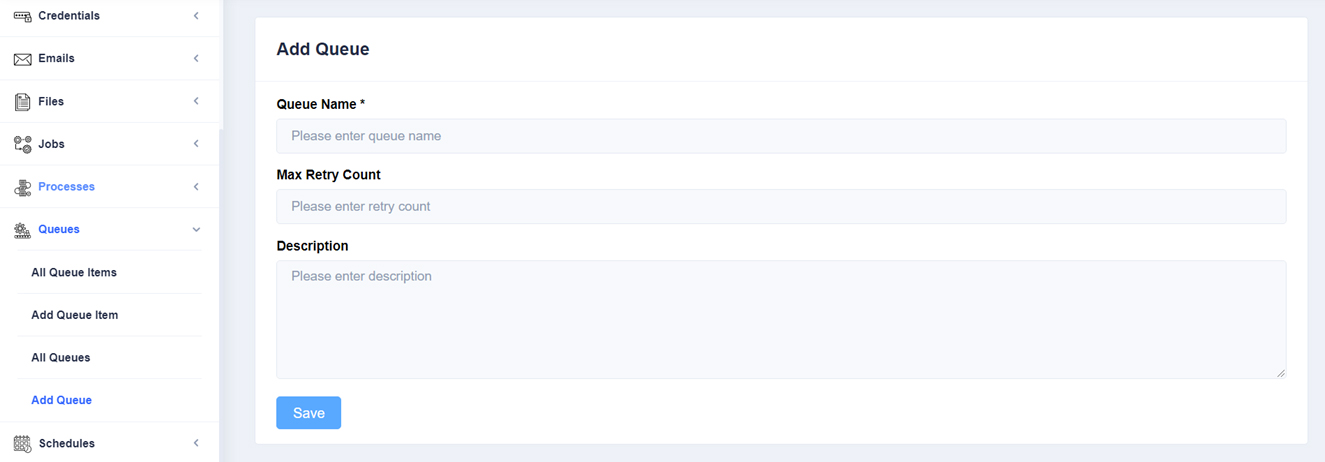
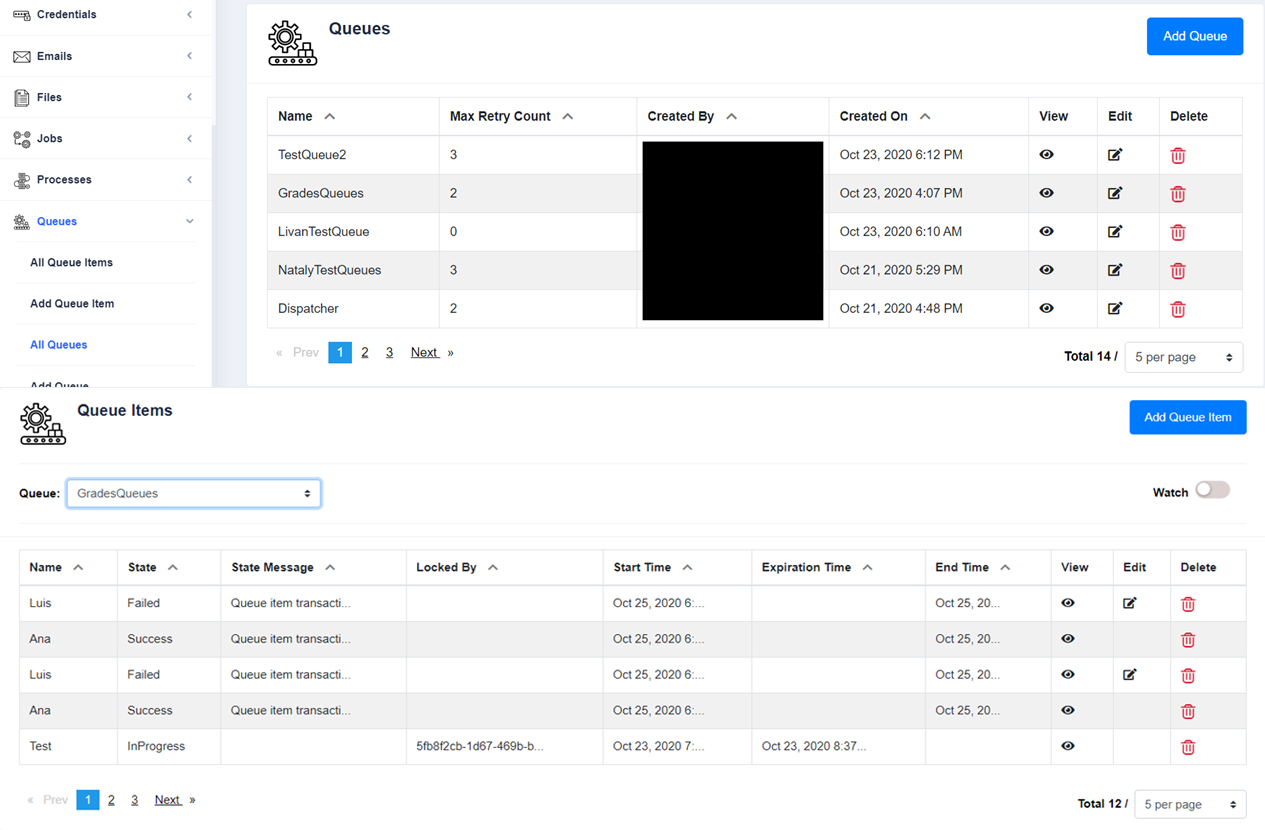
Queues must first be created in OpenBots Server by clicking the Add Queue tab or by navigating to the All Queues tab and clicking the ‘Add Queue’ button. In the Add Queue window, create a name for the queue and input a number for the Max Retry Count. The Max Retry Count specifies the number of times that, if a non-fatal error occurs while processing a queue item, the Server will attempt to retry/reprocess that queue item before marking that specific queue item as a failure. Finally, enter a description of the queue if necessary. Now that a queue has been created, queue items must be added to Server, and this can be done in multiple ways.

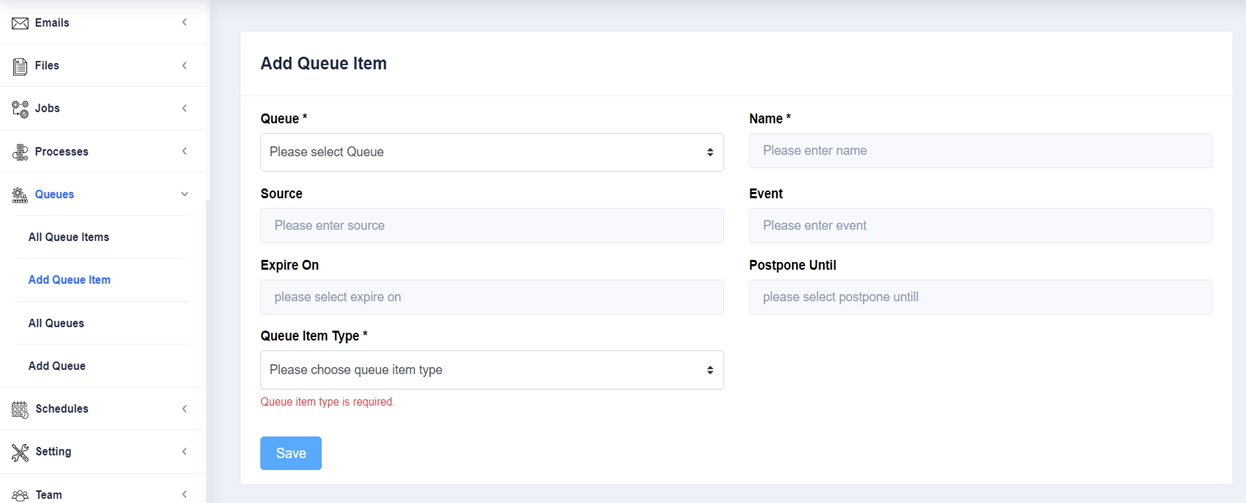
The first method to add a queue item is via the Add Queue Item tab or the Add Queue Item button in the Queue Items tab. The very first thing that should be specified is the queue that the queue item will be added to by selecting it from the Queue dropdown. Next is to specify the name of the queue item that will be added. The next fields to enter are the Source, Event, Expire On, and Postpone Until fields.

These fields are all optional but can provide additional context to a queue item. The Source and Event fields provide additional context from a business context. Let us say that there is an employee onboarding process and a system to auto-create a queue item from the API. The source could be set to “X System” and the event could be titled “New Employee Added.” The Expires-On and Postpone-Until fields are self-explanatory. The Expires-On field indicates the date on which the queue item will expire and the Postpone-Until field indicates when the queue item will be ready to be processed. For example, if the queue item is created on a Monday but the Postpone Until date is set to Saturday, then the queue item will be created on Monday but it won’t be available for processing/added to the queue until Saturday.

Lastly, the Queue Item Type needs to be selected and there are two types to choose from, which are Text and JSON. The difference between the two is that a queue item with the Text type is a simple line of text that can be used for processing things like invoice numbers, email addresses, etc. A queue item with the JSON type is similar to the Text type in that they both store information, however the JSON type stores multiple pieces of data. The JSON type can store data such as complete invoice breakdowns (invoice numbers, invoice dates, invoice amounts, etc). When the type is chosen, a window will appear where the information that the queue item will contain can be specified. Click the Save button and the queue item will be created, marking the end of the first method of creating a queue item.

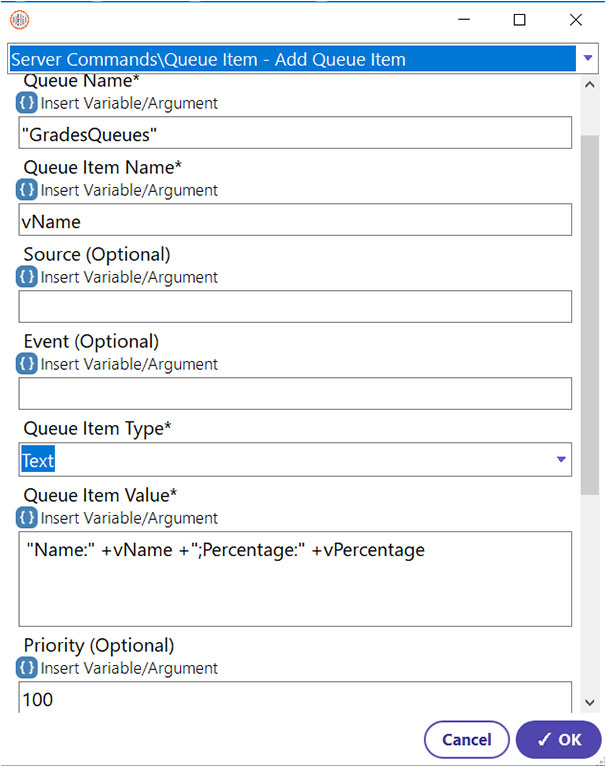
The second (and more common) method of creating a queue item is using the Add QueueItem command in OpenBots Studio. This command functions very similarly to the previous method in that the name of the queue that the item will be added to, the name of the queue item, its type, and its value all need to be specified. However, there are two fields that have been added, the JSON Type and the Priority fields. The JSON Type field will only appear when the ‘JSON’ QueueItem Type is selected and is used to provide an object type to represent JSON is being used (Invoice, Credit Reconciliation, Debit Reconciliation, etc). For example, you might have a JSON file that contains information on different types of vehicles like cars, boats, and motorcycles. In the JSON Type field, ‘Vehicles’ could be entered to specify that the JSON being used refers to the JSON that contains the information about vehicles.

The other field that was added was the Priority field. This field specifies the priority with which the queue item will be processed when it is worked on by Server, with a priority of 1 being the highest priority and a priority of 100 being the lowest priority. Once the OK button is pressed and the automation is run, the queue item will be added to the specified queue once that section of automation code is reached. This method does have a downside, however. It is not possible to specify a date and time at which to add the queue item to the queue. It will be added as soon as Studio runs the command.
How does a queue work in OpenBots Studio?
OpenBots Studio has several commands that allow its users to interact with queue items, the main commands being the Add QueueItem and the Work QueueItem commands. The Add QueueItem command was covered in the last section so this section will be dedicated to discussing the other QueueItem commands.

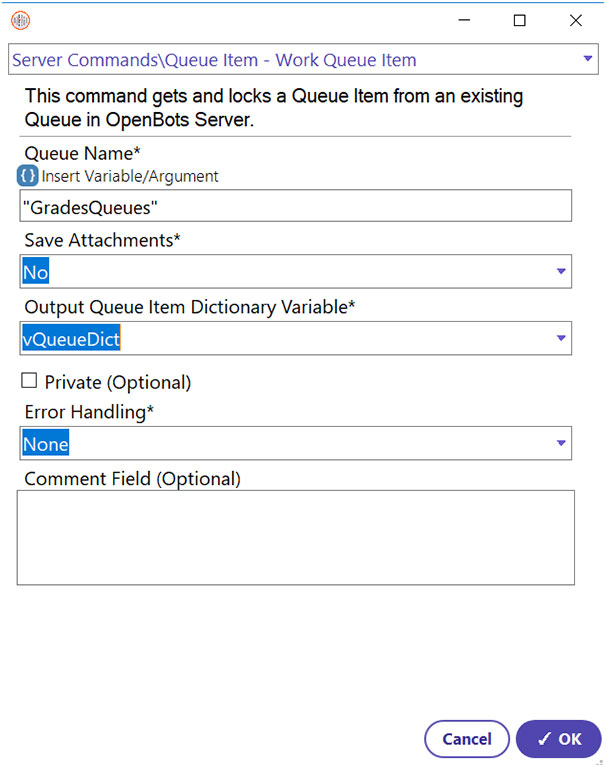
As mentioned above, the Work QueueItem command is the other main QueueItem command. This command signals OpenBots Studio to, as the name implies, work on a queue item that is currently in the Server queue based on the priority of the items in the queue. The queue item pulled and the information it contains is then stored in a dictionary alongside the other queue items. It is important to note that this command only pulls a single queue item, so it is best utilized in loops that loop through the entire queue. While the queue item is being worked by Openbots Studio, its status can be viewed in the Queue Items tab by selecting the proper queue.

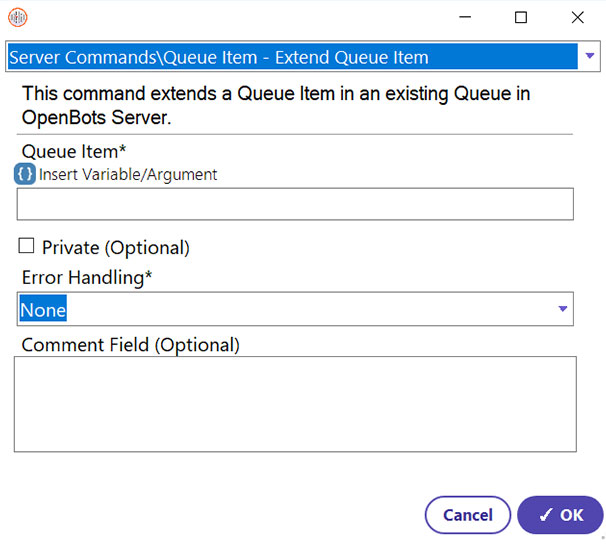
Once OpenBots Studio runs the Work QueueItem command, it will start to execute that queue item. But what if a queue item takes a long time to process? If the queue item takes more than an hour to process, the Server will set the item’s status to ‘New’ (since no errors were encountered) so that it can be worked again by another automation and Studio moves on to the next queue item lined up once finished. This can be avoided by using the Extend QueueItem command. This command adds 1 hour minutes to the processing time of a queue item and affords longer processes the time they need to process queue items. To use the Extend QueueItem command, the only thing that needs to be specified is the QueueItem Dictionary that was created in the Work QueueItem command, any other dictionary will not be accepted and will cause errors.

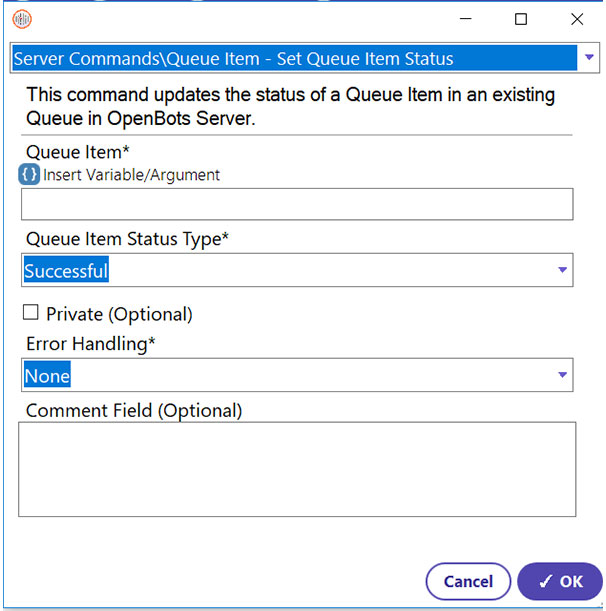
The last command to cover is the Set QueueItem Status command and it is exactly what it sounds like, a command that allows the user to set the status of queue item. This status will be set in Server and the different statuses that can be selected are ‘Successful’, ‘Failed – Should Retry’, and ‘Failed – Fatal’. Setting the status of the queue item is perfect for bug-testing and logging and can be extremely helpful when trying to determine the cause of an issue. To set up the command, the only items that need to be specified are the QueueItem Dictionary created by Work QueueItems and the QueueItem Status Type.

When these commands are used properly, working with and processing queues becomes incredibly simple.

What are the different statuses of a queue item?

A queue item can have several different statuses while it is being worked and when it has finished being worked. The 4 main statuses of a queue item are New, Success, InProgress, and Failed and can be viewed within the All Queue Items tab. These statuses indicate the success level of a queue item’s work status and are great for helping to determine problem items.

New – An item with this status has just been added to the queue using Add Queue Item, the item has been postponed because it took too long to process, an expiration date was added to the item, or the item was added after a previous failed run where the process attempted to retry processing the item.

Success – The queue item has been worked successfully or its status has been set to successful using the Set QueueItem Status command.

InProgress – This queue item is currently being worked.

Failed – Should Retry – The queue item has encountered an error that was not fatal, or its status has been set to Fail – Should Retry using the Set QueueItem Status command.

Failed – Fatal – The queue item has encountered an error that was fatal and stopped processing, or its status has been set to Fail – Fatal using the Set QueueItem Status command.

These statuses play a major role in understanding the life cycle and success of a queue as well as a process. Hopefully, this guide has provided enough information to ensure that queues become regularly used throughout all of your automations and processes!

Newsletter Bot

Lets stay in touch!

Join our weekly newsletter and follow us on social media.

Contact Sales
Call Our Experts!