Home Platform Openbots Studio Create and Run your first bot

How To Create & Run
Your First Bot

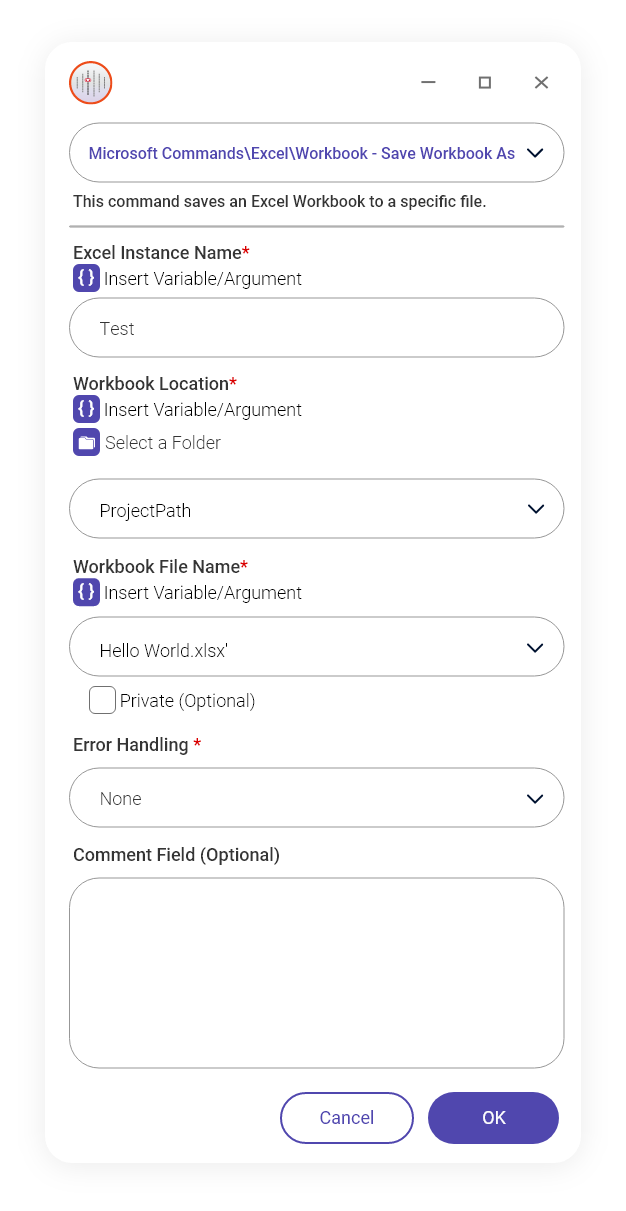
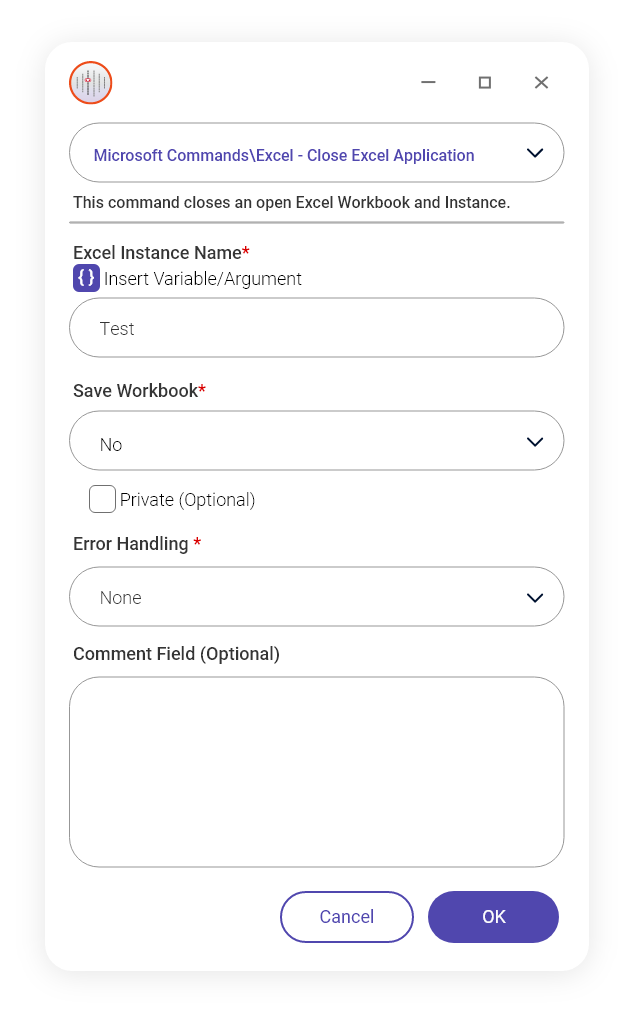
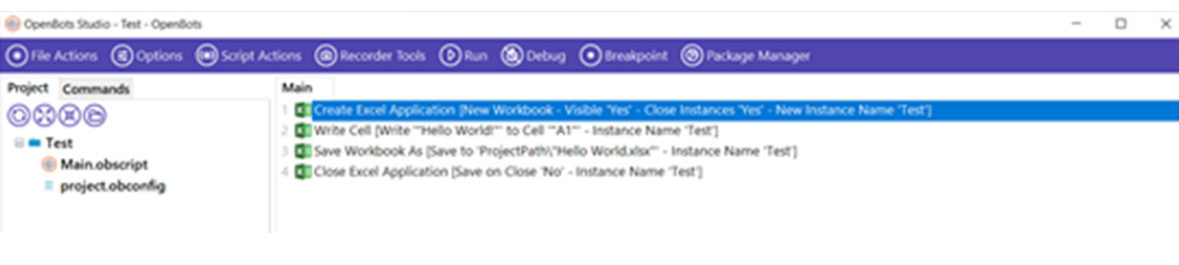
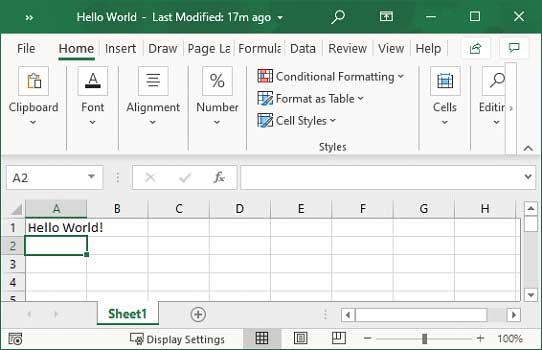
Use the following instructions to create your first automation in OpenBots Studio!

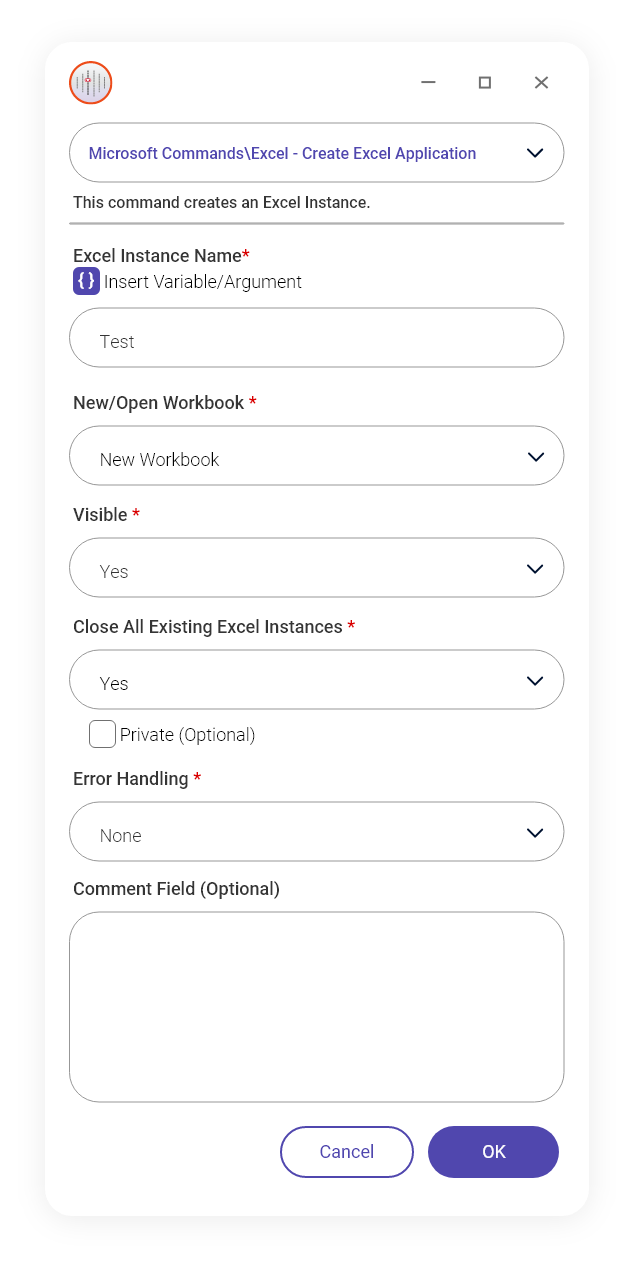
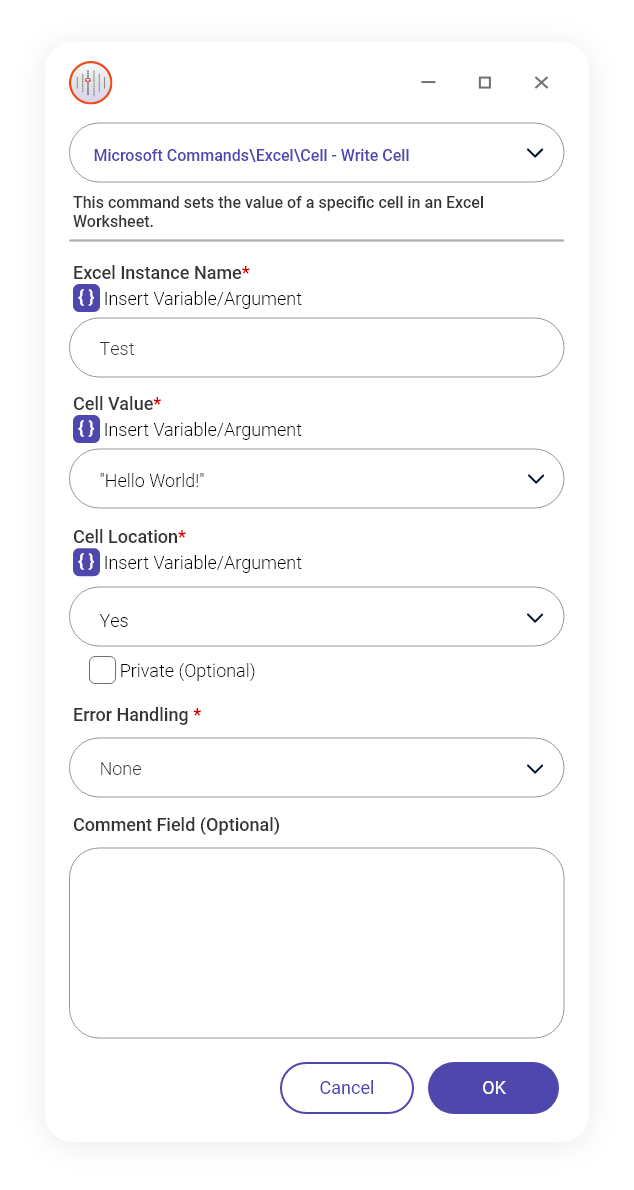
This is an extremely simple automation that will enter the text “Hello World” into a cell in an Excel workbook.

IMPORTANT TIP #1:

You can hover your mouse over the name of a field within a command to view a tooltip that will help to explain the meaning/function of a certain field within a command.

IMPORTANT TIP #2:

It is best to use the Debug option at the top of the screen to run the automation instead of the Run option because, if used correctly, it can help users to find bugs in their code. Specific commands can be tested using the Debug option by left-clicking on the specific command and selecting “Breakpoint” from the Toolbar, and then pressing Debug. This will cause the side panel to display information about the selected command and the values that it contains. This is great for making sure that the correct information is being sent to the command.

The command shown is not to be added to this specific
project but is an example of tip #1 made above.
The picture shown below is not to be added to this specific project but is an example of tip #2 made above. As can be seen, the Example variable equals 10 before it goes into the Set Variable command. Its value is then increased by 5 by the Set Variable command before being shown.

Now to move on to the guide!

Step 1 Set up a new project as seen in the Setup and Configuration guide. The project can have whatever name is desired!

Step 2 Delete the Show Message command. This command will appear in every new project that is created. It is not needed for this project.

Step 3

First, an Excel workbook needs to be opened. And this can be done with the Create Excel Application command. This command tells the automation to create/open an Excel workbook and assigns that specific workbook and Excel Instance Name.

Excel Instance Names are variables of the OBAppInstance type that the user assigns to each Excel workbook opened by the automation. This is done so that the automation can determine which Excel workbook to use certain commands on.

  • Select Excel Commands –> Create Excel Application in the Commands List
  • Use the Ctrl+K hotkey in the ‘Excel Instance Name’ field to pull up the Variables Manager window and click on ‘New’ to create a new variable. Enter “Test” as the variable name and select ‘OBAppInstance’ as the type and then click on ‘Ok’ twice to create this variable and use it in order to refer to this instance of Excel.
  • Because an existing workbook is not being opened and instead a new one is being created, select the “New Workbook” option from the dropdown.
  • Set the “Visibility” to “Yes.” This means that the workbook will be open/visible when the automation is run.
  • Set the “Close All Existing Excel Instances” to “Yes.” This ensures that Excel is not already open when the automation is run.
  • Click OK
Step 4 Now that the Excel workbook is open, it can be interacted with! That means that by using the Write Cell command, a message can be written to whatever cell the user wants! The Write Cell command does exactly what it says in its name, it writes a specific value/message to whatever cell it is assigned.
  • Select Excel Commands -> Write Cell in the Commands List
  • Enter Excel Instance Name (Test). Remember, the automation must know which workbook it needs to interact with before it can perform the necessary actions.
  • Enter the message to be written to the cell. In this case it will be “Hello World!”
  • Enter the Cell Location where the message will be written (A1).
  • Click OK
Step 5 Normally when an Excel workbook has been edited, the user would save the workbook and this would be done with the Save Workbook command. However, this workbook has not been saved before and therefore needs to have a name assigned to it so that it can be properly saved. This is done with the Save Workbook As command.
  • Select Excel Commands -> Save Workbook As in the Commands List
  • Enter Excel Instance Name (Test).
  • Enter ProjectPath into the Workbook Location. This can be done by clicking Insert Variable or by manual entry. ProjectPath ensures that the file is always saved within the project folder itself. The project folder is the folder that contains the Main.obscript and project.obconfig files.
  • Enter the name that the file will be saved with. Remember to follow standard file naming procedures. (Hello World).
  • Click OK
Step 6 Finally, the Close Excel Application command needs to be added because we have made all of the edits to the workbook that we need to. This command is used to close the specified Excel workbook and optionally save the file if it is an already existing file. It is best practice to close Excel applications/workbooks when the user is finished with them, otherwise they will remain open and could cause problems on subsequent runs of the automation. This will mark the end of your first automation! Remember to save your automation!
  • Select Excel Commands -> Close Excel Application in the Commands List
  • Enter Excel Instance Name (Test).
  • Set Save Workbook to No because the file was already saved using the last command in the previous step.
  • Click OK
List of Commands used in the above process are:
Excel Commands: Create Excel Application, Write Cell, Save Workbook As, Close Excel Application.

Please see the screenshot below for a view of the completed code. To execute the code, click Run to execute the steps that you created!

Once the automation has completed its run, the Excel workbook will appear with “Hello World” entered in cell A1, and the process debugger window will appear indicating that the run was successful. Go check out the results of your first automation!
Newsletter Bot

Lets stay in touch!

Join our weekly newsletter and follow us on social media.

Contact Sales
Call Our Experts!