
Home › Platform › Openbots Studio › User Interface
Project Tab:
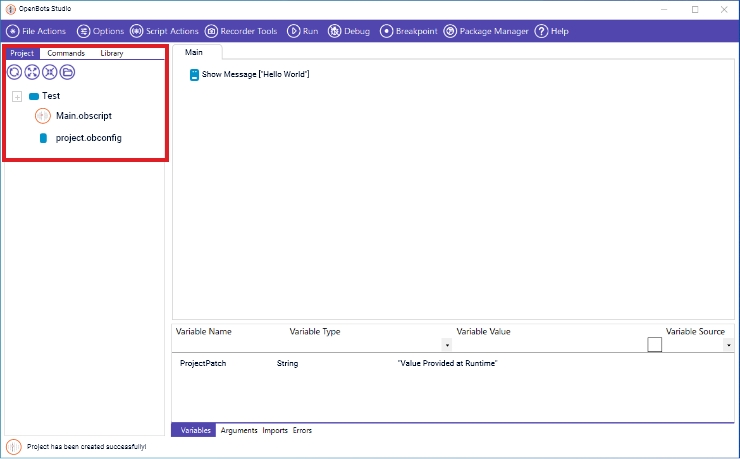
The Project tab is where the user can go to view the file structure of the current project. At the top of the tab are four buttons that perform the following tasks (from left to right) refresh the file structure, maximize the file structure, minimize the file structure, and open the project folder.
Commands List:
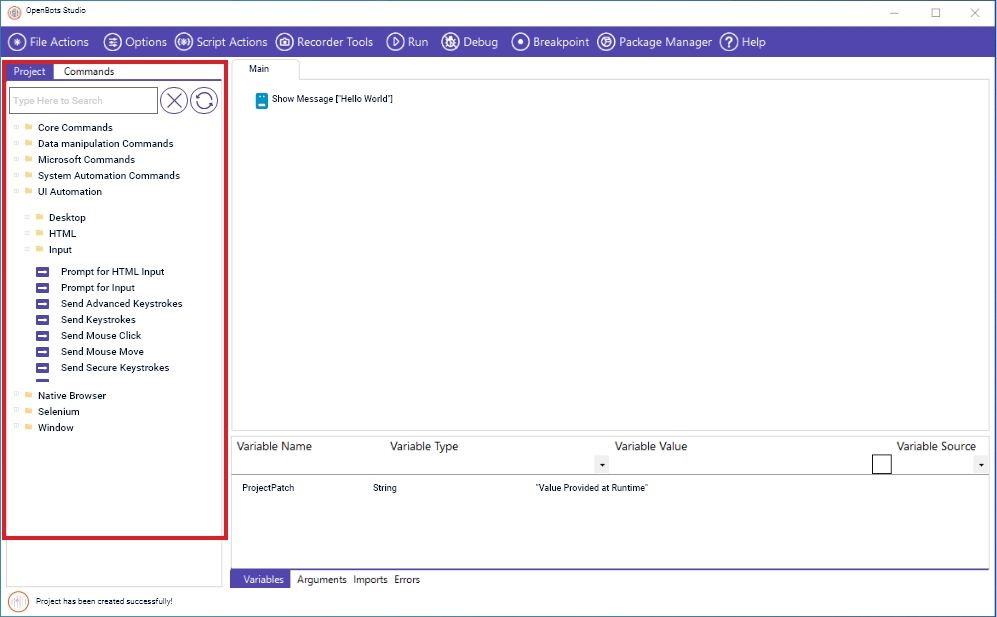
Clicking on the Commands tab opens the list below which contains a varied set of commands. These commands possess a wide array of functions ranging from interacting with various applications to managing/formatting data to even running writing and running your own code! These commands, when combined with one another, are what allow users to create their own automations! As soon as you double click on any of the commands from the Commands tab (and complete the subsequent dialog box which contains that command’s specific functions), it will appear within the Code Window. There is also a search bar at the top of this tab which allows you to search for specific commands, making finding the correct command a breeze!
Code Window:
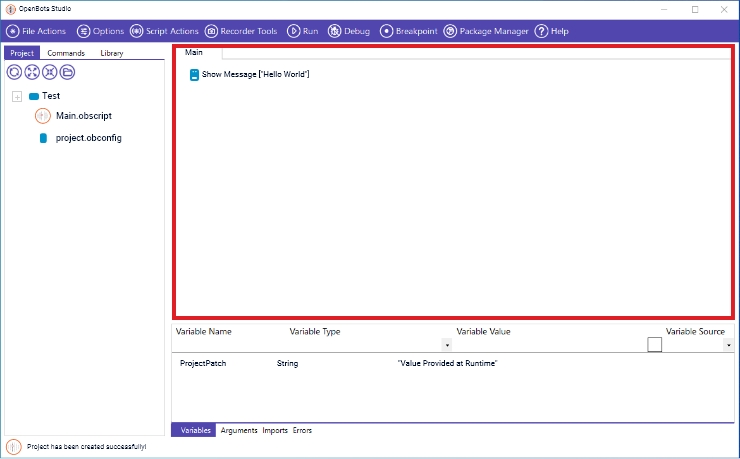
The Project tab is where the user can go to view the file structure of the current project. At the top of the tab are four buttons that perform the following tasks (from left to right) refresh the file structure, maximize the file structure, minimize the file structure, and open the project folder.
Command Options:
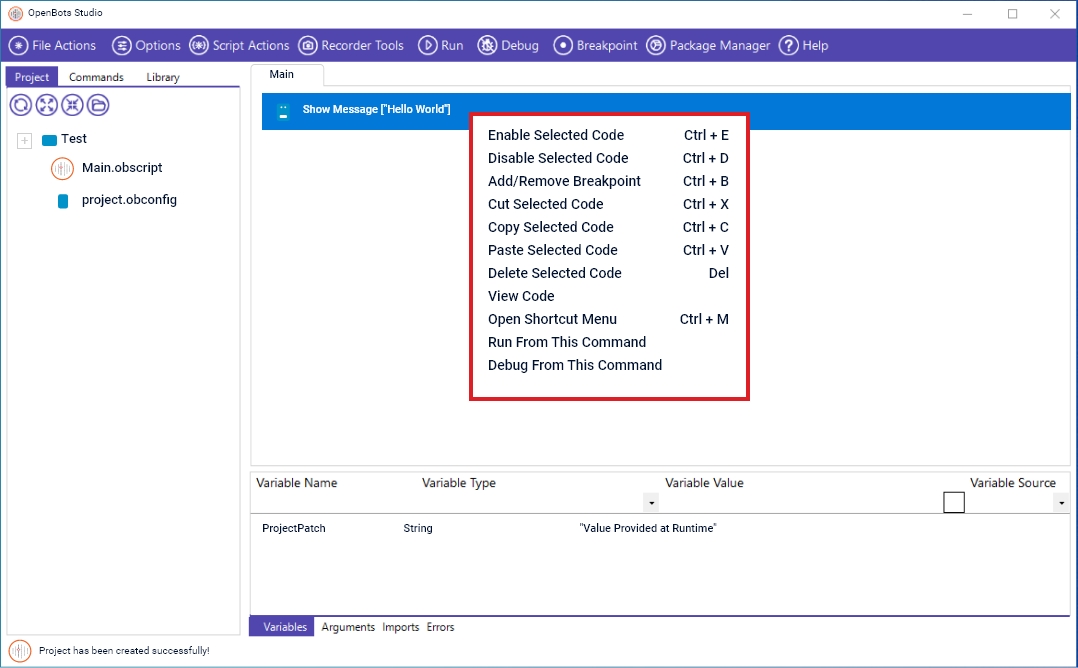
By right clicking on a command in the Code Window, a new set of command options appear that allow the user to interact with and customize their code a little more. The “Enable” and “Disable Selected Code” options are fairly self-explanatory, they tell the automation to either run the selected command as normal or to ignore it. The Enable option only needs to be used after code has already been disabled.
The “Add/Remove Breakpoint” will instruct the automation to pause execution once it reaches the selected command only while debugging (by pressing the “Debug” button in the Action Menu). This will allow the user to see information regarding the variables used within the code up until that point.
The “Cut”, “Copy”, “Paste”, and “Delete Selected Action(s)” commands are self-explanatory and the “View Code” option will open a message window that contains the actual behind-the-scenes code for the selected command.
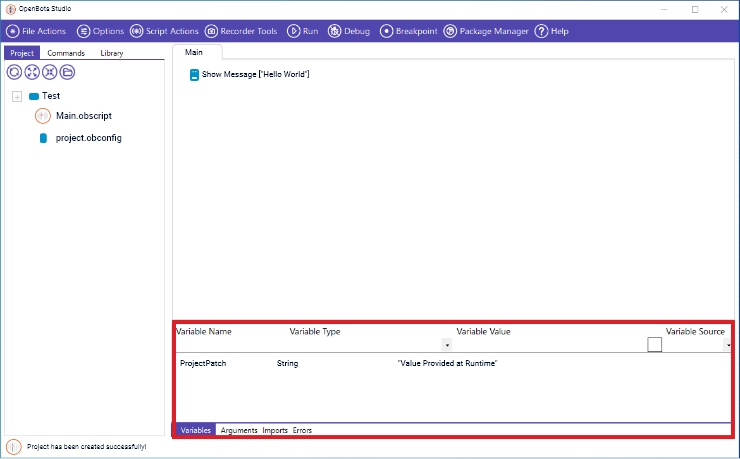
Variables/Arguments Panel:
This is where users can manage all of the variables and arguments that currently exist in their OpenBots automations. From here, users can create new variables/arguments by typing in the name of the new variable/argument being created, selecting the type being created, and providing it with a default value (optional). In the case of arguments, users will also indicate the direction of the new argument (In, Out, or In/Out).
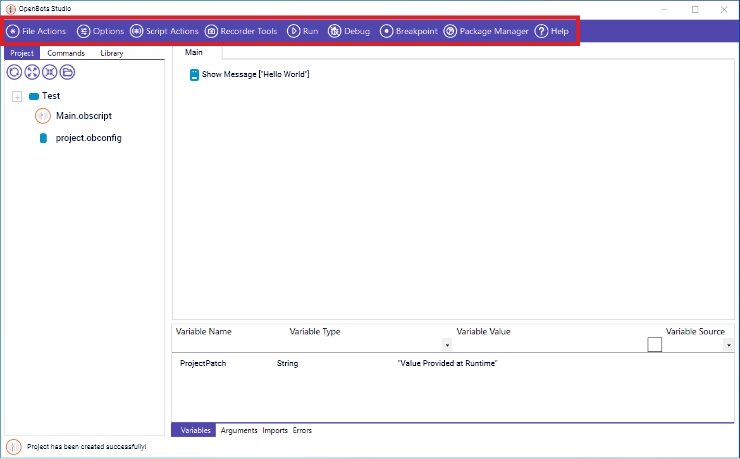
Action Menu:
The Action Menu helps the user to navigate OpenBots Studio, save and execute the code, and customize the application settings.
There are 7 primary menu options for OpenBots Studio:
01 File
Actions
Provides options to add a new project, open an existing project, import an .XML file, save a project, and finally an option to close/restart the application.
02 Options
Provides information about OpenBots Studio capabilities and allows the user to change the settings of the application. It contains:
Variable Manager:
Displays the variables/arguments that have been created in the project and provides the path of the existing file
Element Manager:
Allows the user to manage the elements created using the Element Recorder.
Settings Manager:
Allows the user to change different settings related to OpenBots Studio.
Show Search Bar:
Gives an option to display a search bar on the Action Menu.
About OpenBots Studio:
Displays information about the current version of OpenBots Studio that is installed on the system.
Extensions Manager:
Contains extensions that can be installed which allows users to utilize the Native Browser commands.
03 Script
Actions:
Gives set of functions allowing us to customize the functioning of the scripts. It contains
Schedule:
Allows the User can schedule his/her script to run at a given time by giving details like the script location, the time they want the script to run.
04 Recorder
Tools:
Contains three distinct recorders that allows users to either capture HTML elements from browser applications for use in automations (in the case of the ‘Web Element Recorder’), or to capture things like XPaths, CSS Selectors, and other various HTML/CSS elements (in the case of the Ui and Advanced Ui Recorders).
05 Run:
Allows the user to execute the set of commands on the Code Window. This will open the Bot Engine Window which will display the progress of the automation, which line is currently being executed, and display whether or not an error has occurred.
06 Debug:
Runs the code and, when combined with the “Breakpoint” option in the Toolbar, will show the current values of all variables and commands up to that point in the code.
07 Package
Manager:
Allows users to include additional commands for use in building automations by installing the prerequisite packages. A large variety of packages are available in the Gallery section for use and custom made ones can also be included and used from this section.